LAMP is a group of open-source software installed together to build a web server environment:
- Linux operating system
- Apache web server
- MySQL database management system
- PHP programming language
In this article, I will show you how to install LAMP on Ubuntu.
Update Package
Before working at Ubuntu, you should proceed to update Ubuntu’s software package to the latest version with the command:
sudo apt-get update
Install Apache
Use the following command:
sudo apt-get install apache2
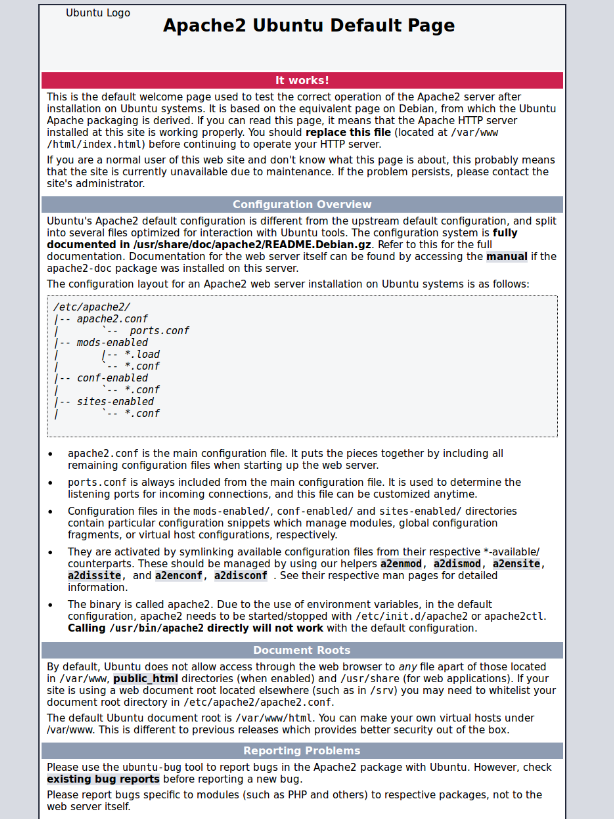
Check if Apache is working, go to http://localhost in the browser. If the browser displays the following, then you have successfully installed Apache:
On Ubuntu, our source code will be stored in a directory /var/www/html. I use the command:
ls /var/www/html
then will see in the HTML directory now contains 2 files index.htmland index.nginx-debian.html.
Install PHP
Install PHP
To install PHP and PHP modules for Apache on Ubuntu, use the following command:
sudo apt-get install php libapache2-mod-php php-mcrypt
To check if PHP and Apache are compatible, we will restart Apache with the command:
sudo service apache2 restart
Then create 1 file test.php:
sudo gedit /var/www/html/test.php
with the following content:
<?php
  phpinfo();
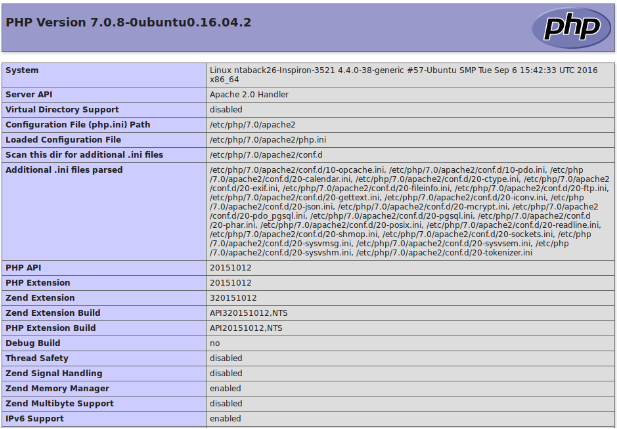
If the browser displays the following, then it is assumed that we have successfully installed PHP:
Install the module for PHP
Use the following command to display the list of modules for PHP:
sudo apt-cache search php-
To install any module, use the command:
sudo apt-get install module-name
Install MySQL
Install MySQL
To install MySQL, use the following command:
sudo apt-get install mysql-server php-mysql
During the installation process, the system will ask you to enter a password and confirm the password for the root account of MySQL.
Install phpMyAdmin
- As a first step, use the following command to install phpMyAdmin:
sudo apt-get install phpmyadmin
- The installation of phpMyAdmin takes quite a long time. During the installation process, the system will ask us to select which web server is automatically configured when running phpMyAdmin. Now you choose apache2 and click
Enter. - After that, the system will require to create a password for phpMyAdmin, you just use the password created at the MySQL installation step.
- Open the file and
/etc/apache2/apache2.confadd this line to the end of the file:
Include /etc/phpmyadmin/apache.conf
- Finally, restart Apache with the command:
sudo service apache2 restart
Open the browser, go to localhost://phpmyadmin, phpMyadmin will ask for your account and password, then enter rootand the password you created in the installation.
OK, the installation of LAMP on Ubuntu is complete!