CyberPanel is a completely free control panel and supports many languages, it uses OpenLiteSpeed as the webserver. In the previous article, we have guided to install CyberPanel. In this article, we will show you how to use CyberPanel.
How to use CyberPanel?
1. How to create Packages on CyberPanel?
A package is a tool used to divide resources for websites, if you have a need to divide into host packages with different configurations of resources for users, this is the function of Package, almost any control panel has a Package. . In this article, We will show you how to create a Package on Cyber Panel
To create a Package, you need to access and log in to the Cyber panel, notice the menu bar on the left, and select:
Package => Create Packages and fill in all the necessary parameters
- Packages name: Package name
- Domains: The number of domains created by the Package (if you want to be unlimited, enter 0)
- Disk Space: The created capacity of the Package (if you want to be unlimited, enter 0)
- Bandwidth: Package’s transmission data (if you want to be unlimited, enter 0)
- FTP Accounts: The created FTP account of the Package
- Databases: Package’s generated database
- Emails: The generated email number of the Package
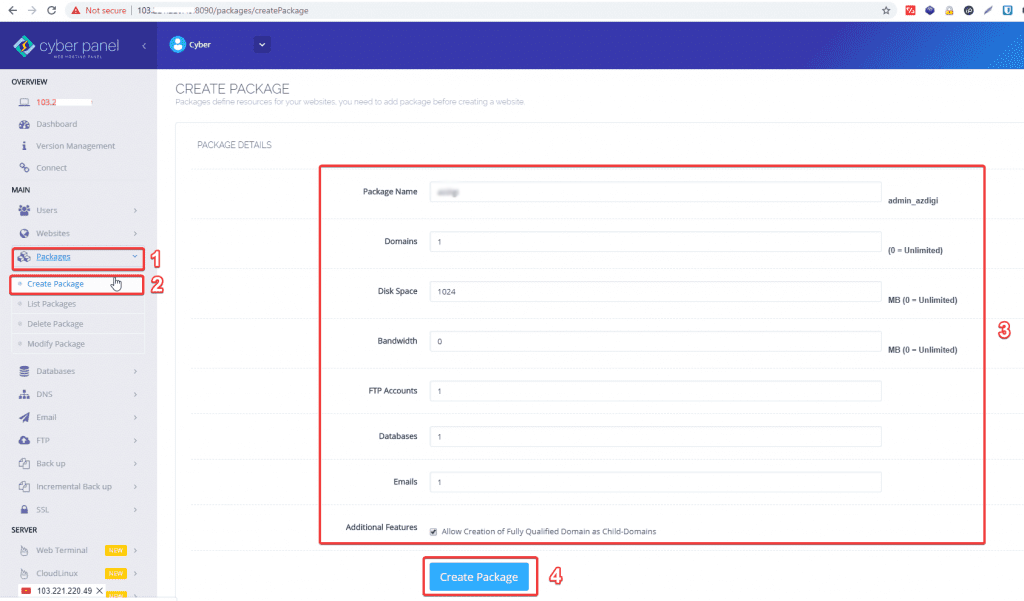
After filling in the above information, select Create Package to create a Package
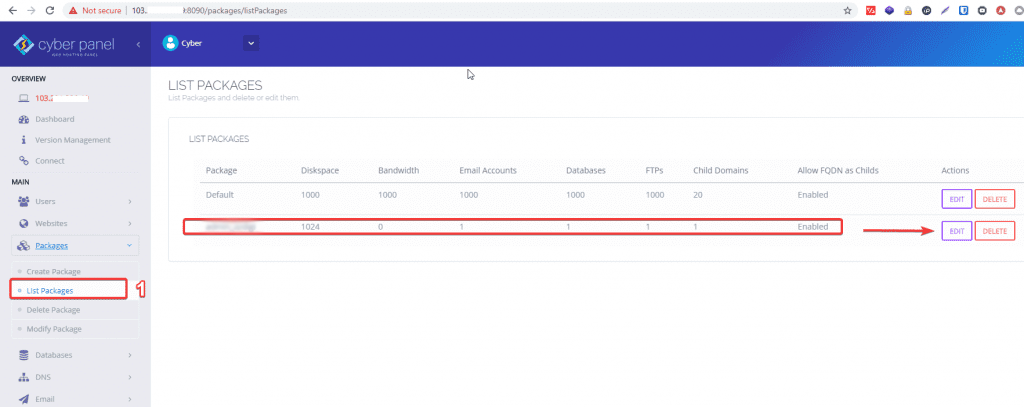
To see the Packages created and edited, go to Package => List Package => Edit to edit.
2. How to create a User on CyberPanel?
User is a child account created by Admin or reseller, this is the account with the lowest permissions and will have certain restrictions on manipulation rights. In this article, we will show you how to create a User on Cyber Panel
To create a User you will need to access and log in to Cpanel, at the left menu bar select Users -> Create New User and fill in all the information.
- First Name: Any name (unsigned)
- Last Name: Any name (unsigned)
- Email: Your email
- Account Type: Select the account type (here you choose the user)
- Username: Username
- Password: Password
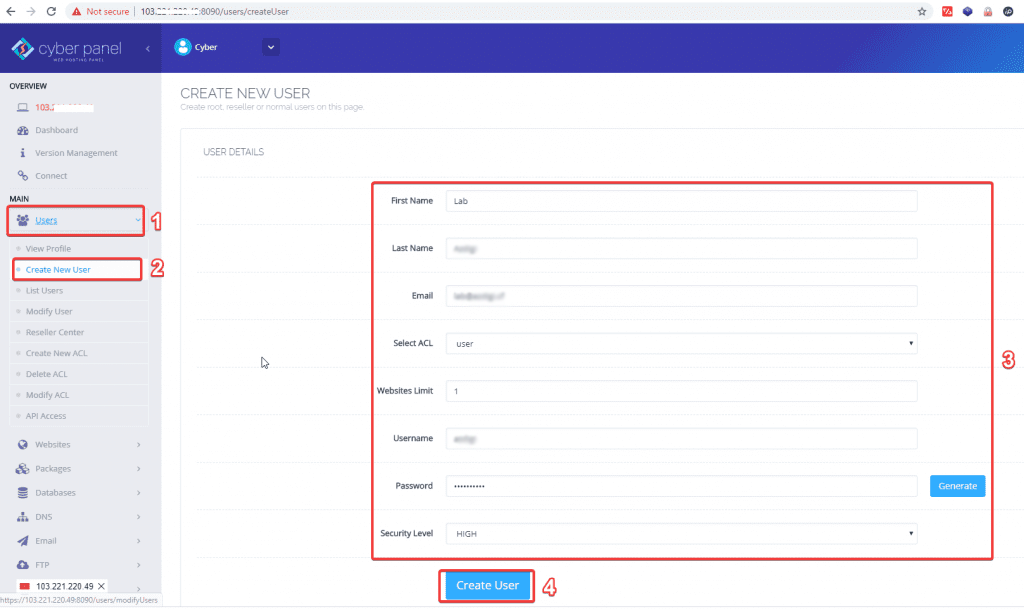
After filling in all the information, select Create User to create a user account.
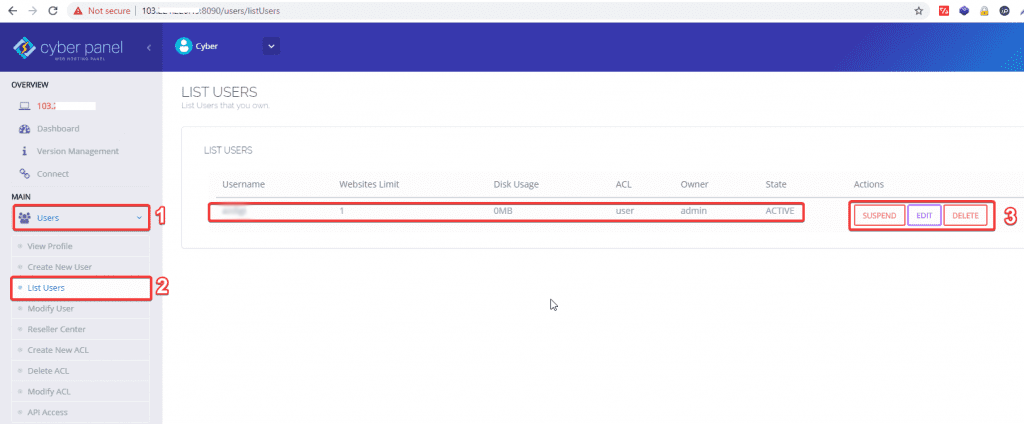
To view the created users, go to Users => List users => Edit to edit
3. How to Add Website on CyberPanel?
After you have created the Package, create a User for Cyberpanel, the next step We will guide you is to add a website for that user.
To create a website on Cyber Panel you do the following:
Access and log in to Cyber Panel, in the menu on the left, select Websites -> Create a website and fill in the information as shown.
- Select Package: Select the created Package
- Select Owner: Select the created user account
- Domain name: The name of the website to create
- Email: Your email
- Select PHP: Select the PHP version for the website
- SSL: If you check the SSL section, the cyber panel will automatically register Let’s Encrypt SSL. (You will get an SSL creation error if the domain name is not pointing to the server)
- DKIM support: If you check this section, Cyberpanel will automatically generate DKIM for domain email.
- open_basedir protection: Website protection feature
- Create Mail Domain: Cyber will create more email domains
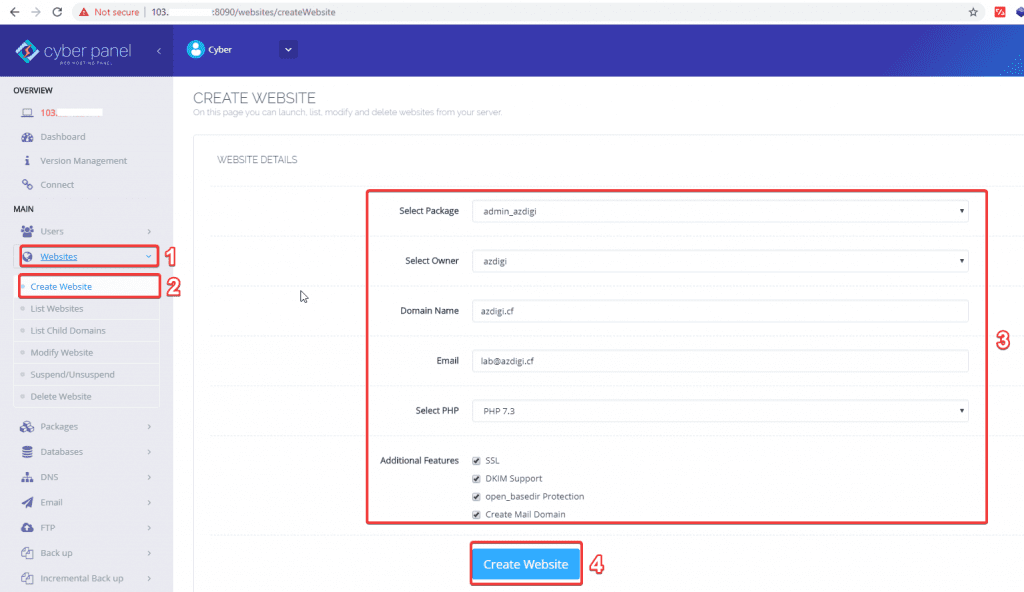
After filling in all the information, select Create Website to create a website
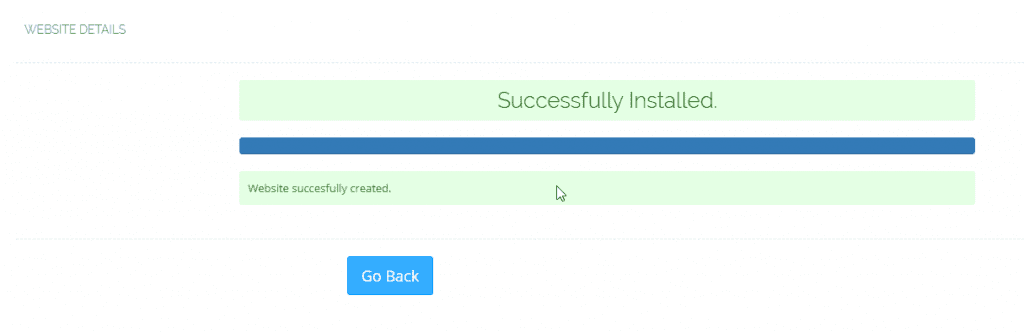
As shown, you have successfully created.
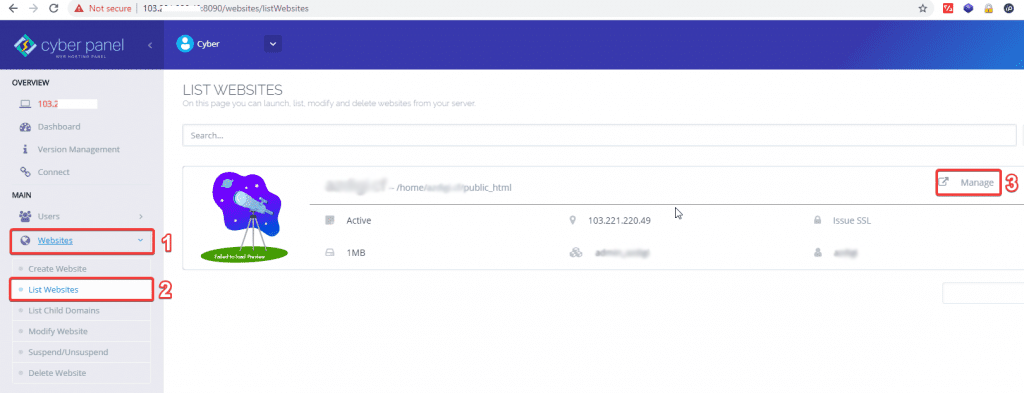
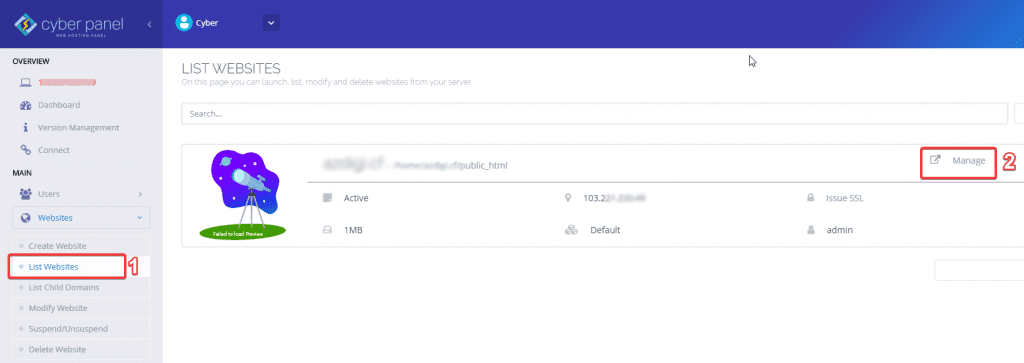
To view the websites you have created or want to edit your website, go to Websites -> List Websites => Manage
4. How to install WordPress automatically on CyberPanel?
To install a WordPress website automatically on Cyber Panel you do the following:
Access the Cyber Panel administration, in the menu on the left you choose Websites -> List websites -> Go to the Manage section of the website to be installed
You scroll down to the bottom to find APPLICATION INSTALLER -> select WP + LSCache
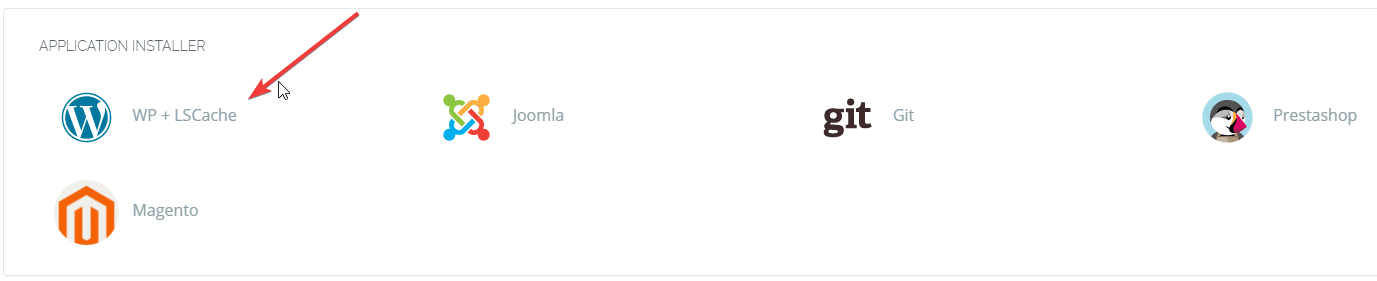
Proceed to fill out the information for the website
- Blog Title: Title of Websites
- Login User: User login
- Login Password: Login Password
- Email: Admin email of Websites
- Path: The directory containing the source code (this section should be left blank to install the website in the default directory)

After filling in all the information, select Install Now. The installation process will take a few minutes, after successful installation you will receive a message as shown
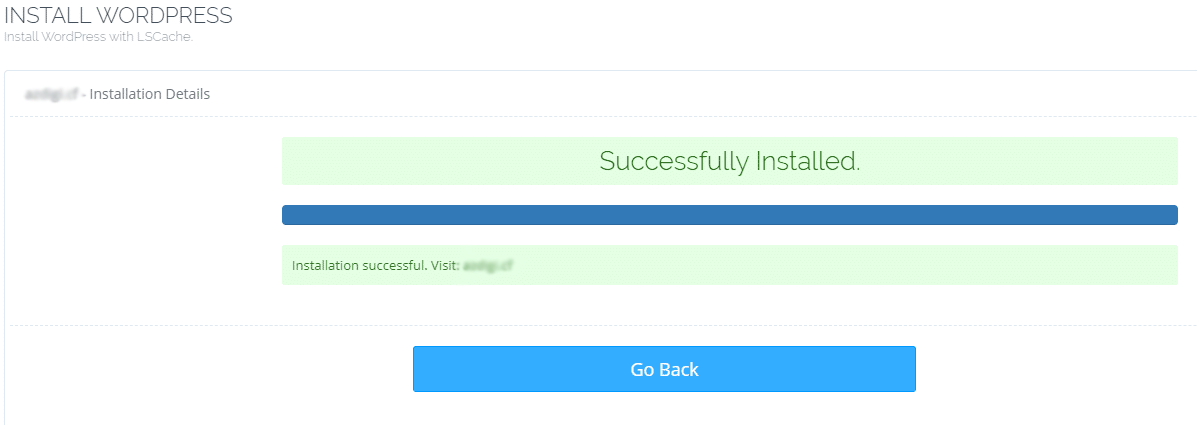
Next, go to any browser and visit the website to check the results
The link to access the website admin page will be: http://domain.com/wp-admin
5. How to install Let’s Encrypt on Cyber Panel
Before installing SSL for your website, you must ensure that the domain has been successfully pointed to the server IP.
To install SSL, you do the following, access the Cyber Panel administration, in the menu on the left, select SSL -> Manage SSL -> Select the website to install
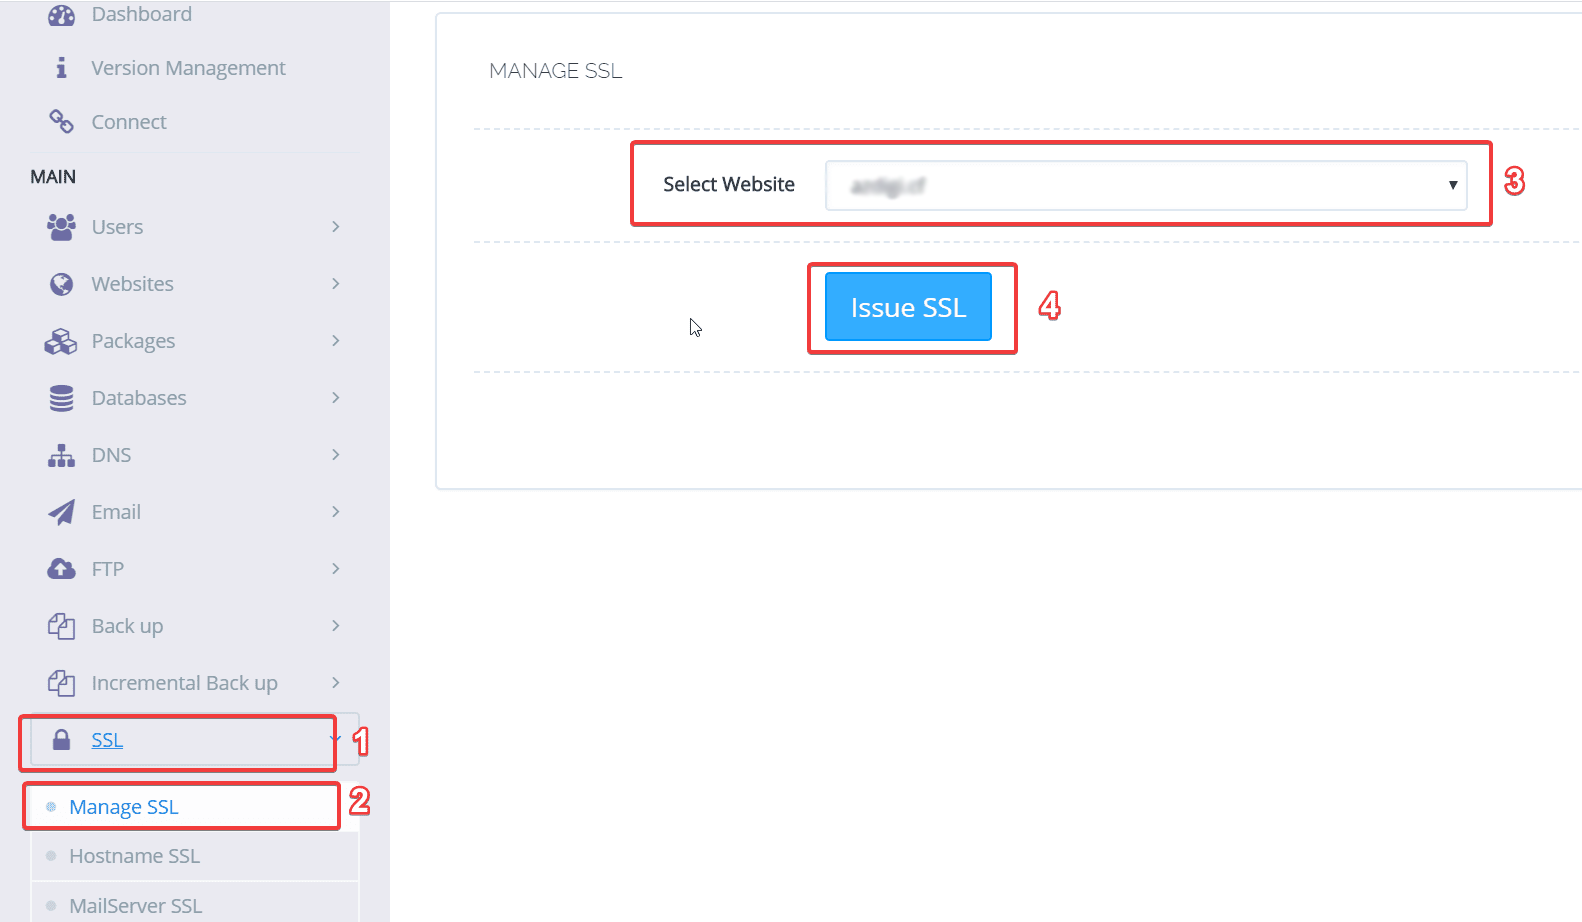
Click Issue SSL to proceed with the installation
Then the installation process will take a few minutes, when the installation is successful, you will receive a message as shown
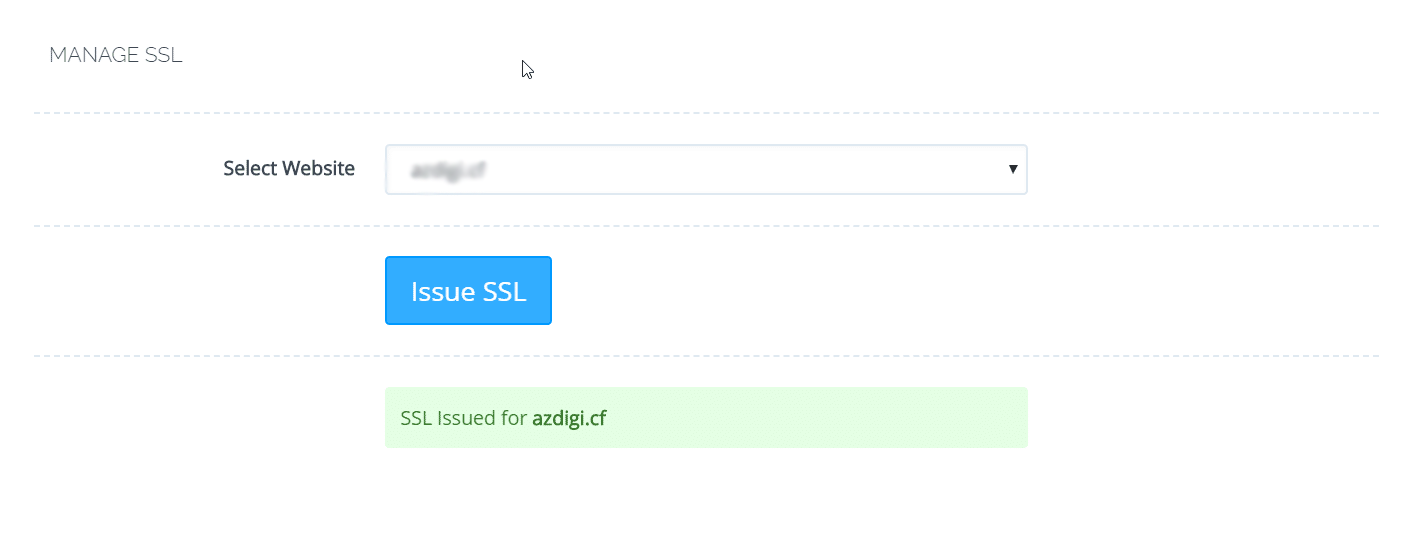
Next, go to any browser and visit the website to check if SSL has been successfully installed.
Above are basic instructions on how to use CyberPanel. If you have any questions or concerns, please leave a comment below this article.