FileZilla Client is a program that supports transferring data files between personal computers and web servers via the Internet using FTP (File Transfer Protocol).
Download an Install File Zilla Client
1. Download and install FileZilla
In order to use the FTP protocol, there are many different ways and much supporting software. In this article, vHost will guide using FTP client FileZilla to connect to the server.
Step 1: First, download FileZilla here.
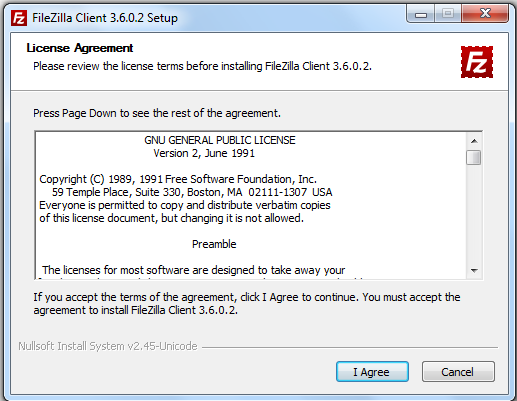
Step 2: Install the newly downloaded installation file, Select “I Agree”. Then click Next until done
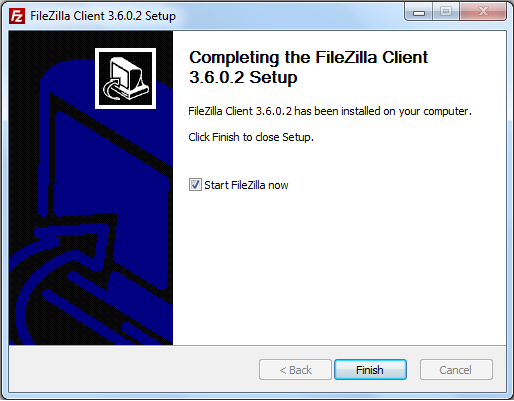
Step 3: Click Finish and start the program
2. Set up FileZilla basic configuration to connect FTP to the server
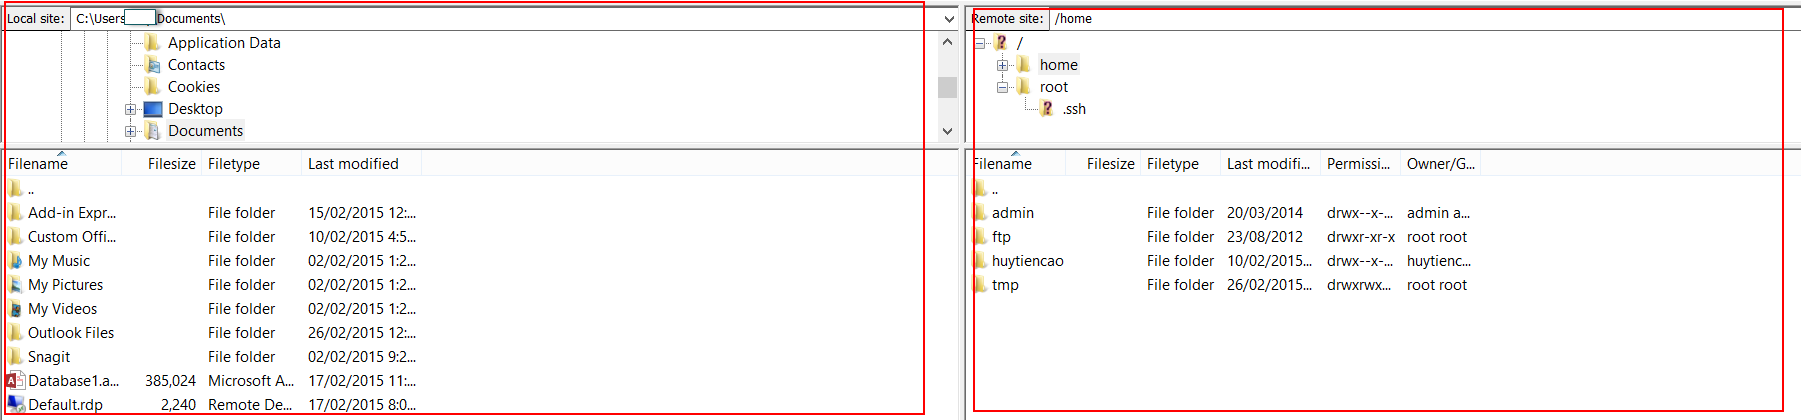
After successful installation, FileZilla will have the following interface:
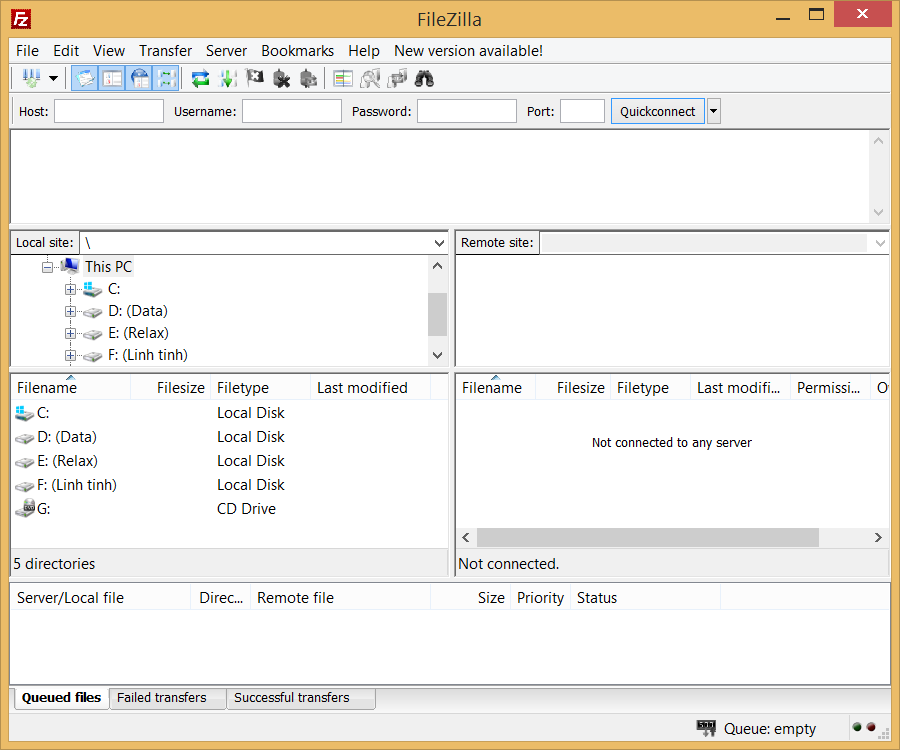
* In case you need to make a fast FTP connection to the server, you can perform Quickconnect

Basic parameters:
1. Host: Can enter the host’s IP – VPS – Server or hostname
2: Username: FTP account
3: Password: FTP password
4: Port: Port connects FTP (default FTP is 21, SFTP is 22)
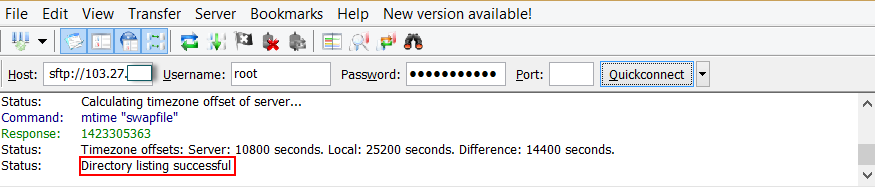
If connected successfully, there will be a “Status: Directory Listing successful” message.
* In case you want to store the connection to facilitate the later use process, do the following:
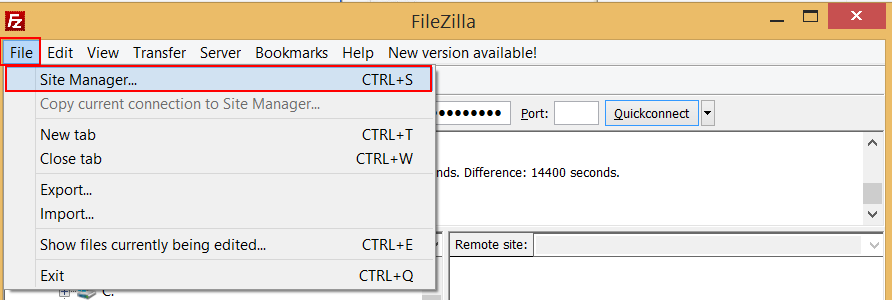
Step 1: Click File -> Site Manager to access FTP Account management (or press Ctrl + S)
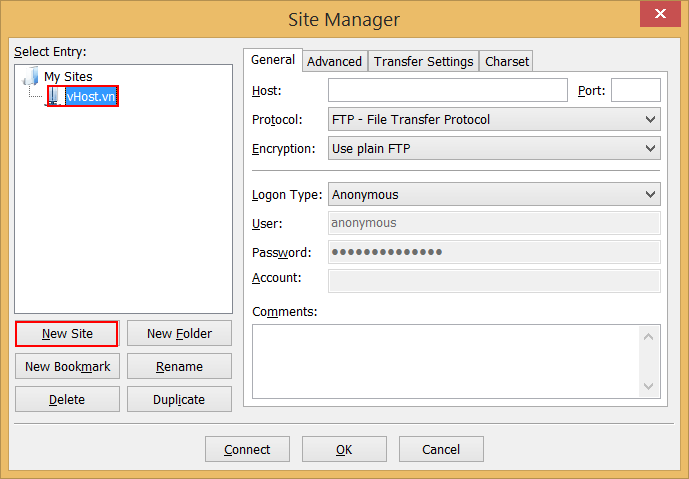
Step 2: To create a new connection (for the first time), click New Site and name it to make it easy to distinguish and manage (if there are multiple FTP accounts).
Step 3: Set up the FTP parameters connected to the server
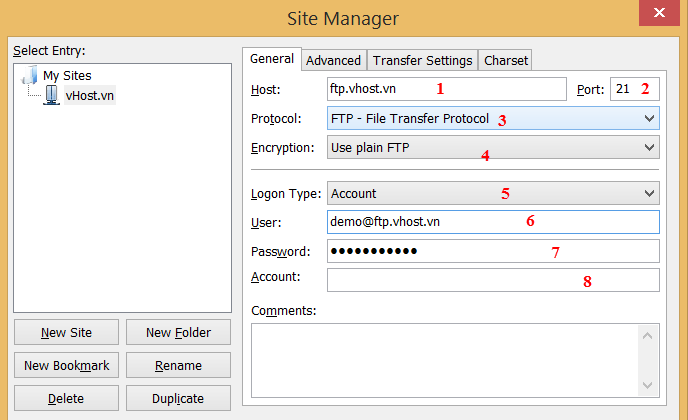
The basic parameters are as follows:
1: Host: Can enter host IP – VPS – Server or hostname
2: Port: Port connects FTP (default FTP is 21, SFTP is 22)
3: Protocol: SFTP or FTP
4: Encryption: Encryption under plain FTP or TLS
5: Login Type: Select Account or Ask for password
6: User: FTP account
7: Password: FTP password
8: Account: Set a name that is easy to remember
Note: For FileZilla new version, when Quickconnect will not be able to connect FTP successfully. The reason is that by default FileZilla version is encrypted under TLS, in order to overcome this case, it is necessary to change the Encryption section to “Only use plain FTP (insecure)” to be able to connect successfully with FileZilla.
Then click OK to save and exit. Next, go back to File -> Site Manager and select the newly created connection and click Connect to the server.
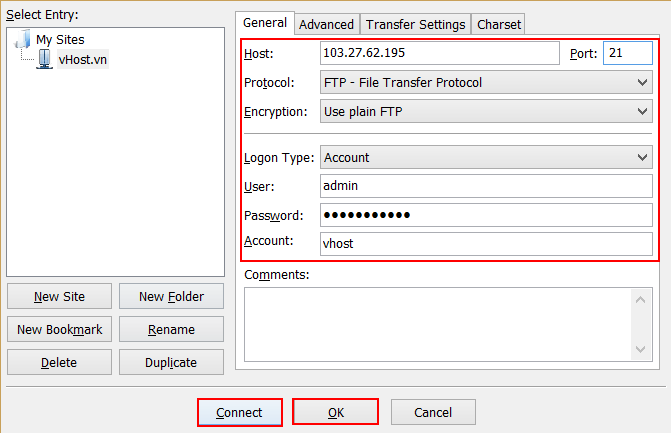
If connected successfully, there will be a “Status: Directory Listing successful” message.

3. Instructions for using FileZilla to transfer data
After successfully connecting FTP to the server, FileZilla will have 2 parts that represent data in 2 places – computer (left window) and server (right window, internet).
To put certain data (files, folders) from the computer to the server, right-click and choose the data on the computer and click Upload (or you can use drag and drop).
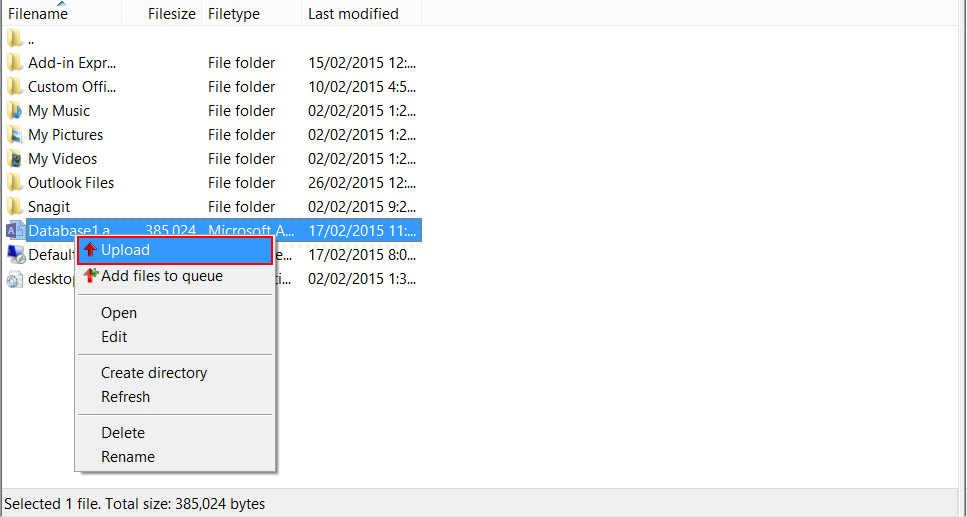
Waiting for a time (depending on how much or how little data this time is slow or fast) will see the data you want to upload on the server.
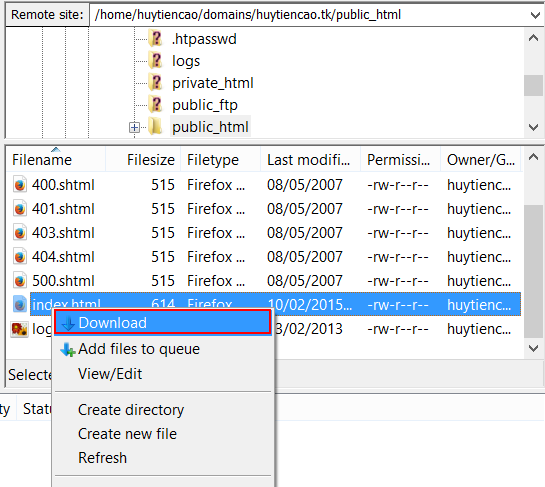
Similarly, to get data on the server to the computer (download), we choose the data on the server, right-click and choose Download or use drag and drop.
Here are the basic instructions for using FileZilla, hoping that this post can make it easier for you to use FileZilla. Good luck!