If you want to use the email under your own domain name, you have to spend a large amount of money every month, such as G Suitel is $ 4.2 / 1 mail / 1 month. But today I introduce to you the Zoho Mail service that can create email under your own domain name for free.
Because it is free, the restriction of Zoho Mail is:
- Account: Only 1 domain
- Limit: 25 users
- Mailbox capacity: 5GB / 1 mailbox (upgrade to $ 2.5 / user / month)
However, it is too good for a free service.

What is Zoho Mail?
Zoho Mail is an email service with your domain name that can be understood as a service that provides email under the same Gmail, Hotmail, but it can sync with other Zoho utility services such as Zoho Docs and Zoho Storage.
The difference of Zoho is that it allows you to use your own domain name as soon as you register without having to go through another service like G Suite. There have been many opinions that Zoho Mail was born for professional email needs
Among the business email service providers today, ZOHO Mail is considered to be a provider of many useful tools and features. Email products by domain name provided by ZOHO MAIL are high capacity, fast and accurate delivery speed.
Therefore, Zoho Mail is still a full choice for many companies and businesses with their commercial business today.
How to create your own Zoho Mail domain name for free
If you are looking for Zoho Mail as well as information about this email provider, in the next section of this article we will show you how to create a Zoho Mail private domain email for free.
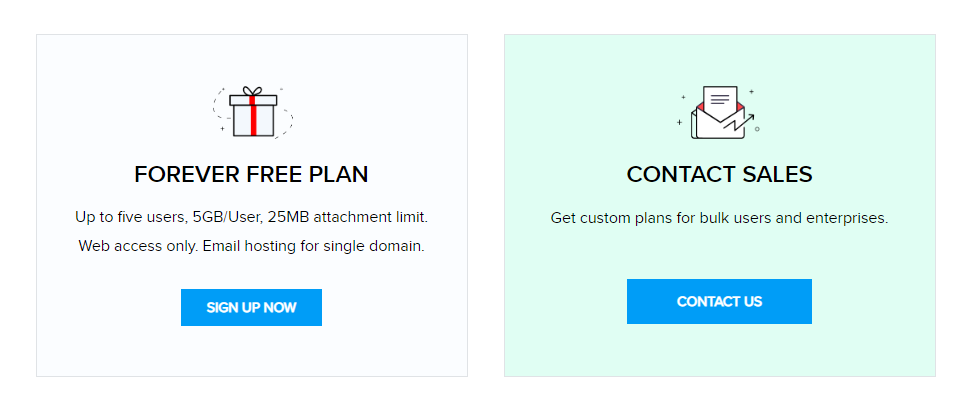
Step 1:
Visit the Zoho Mail homepage via https://www.zoho.com/mail/zohomail-pricing.html and click the Sign-Up button in the Free Plan section. Or depending on your needs, you can choose suitable packages such as MAIL LITE, MAIL PREMIUM, WORKPLACE
Next, the system will display a box for you to enter the Domain (the current website domain name where you need to create an email). You enter your website address and wait for confirmation.

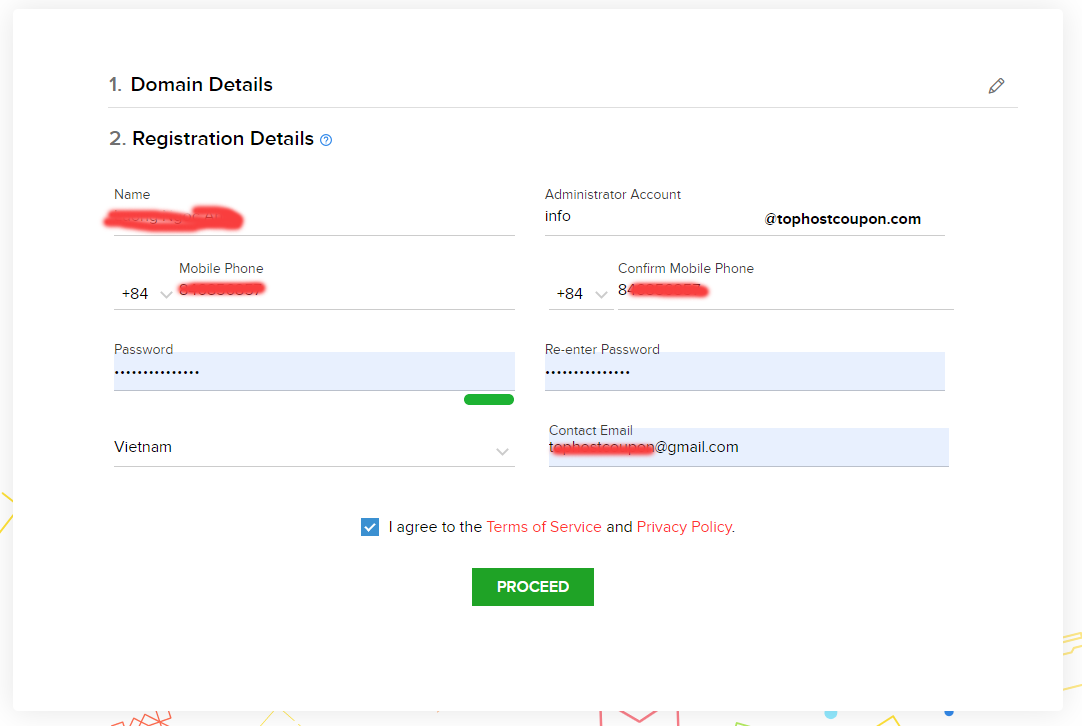
Step 2:
In the next section, you need to declare some necessary information to authenticate and initialize your Zoho Mail private domain email address, including:
- Your Name
- Your Administrator account
- Password
- Contact Email (Other email addresses to contact and confirm, can enter the main email address you are using)
- Your country
After entering all information, click “PROCEED” to complete the registration.
Step 3:
After clicking Sign Up on the summary page, the system will confirm by SMS send to your phone number.
After successful SMS confirmation, you will need to verify domain ownership.
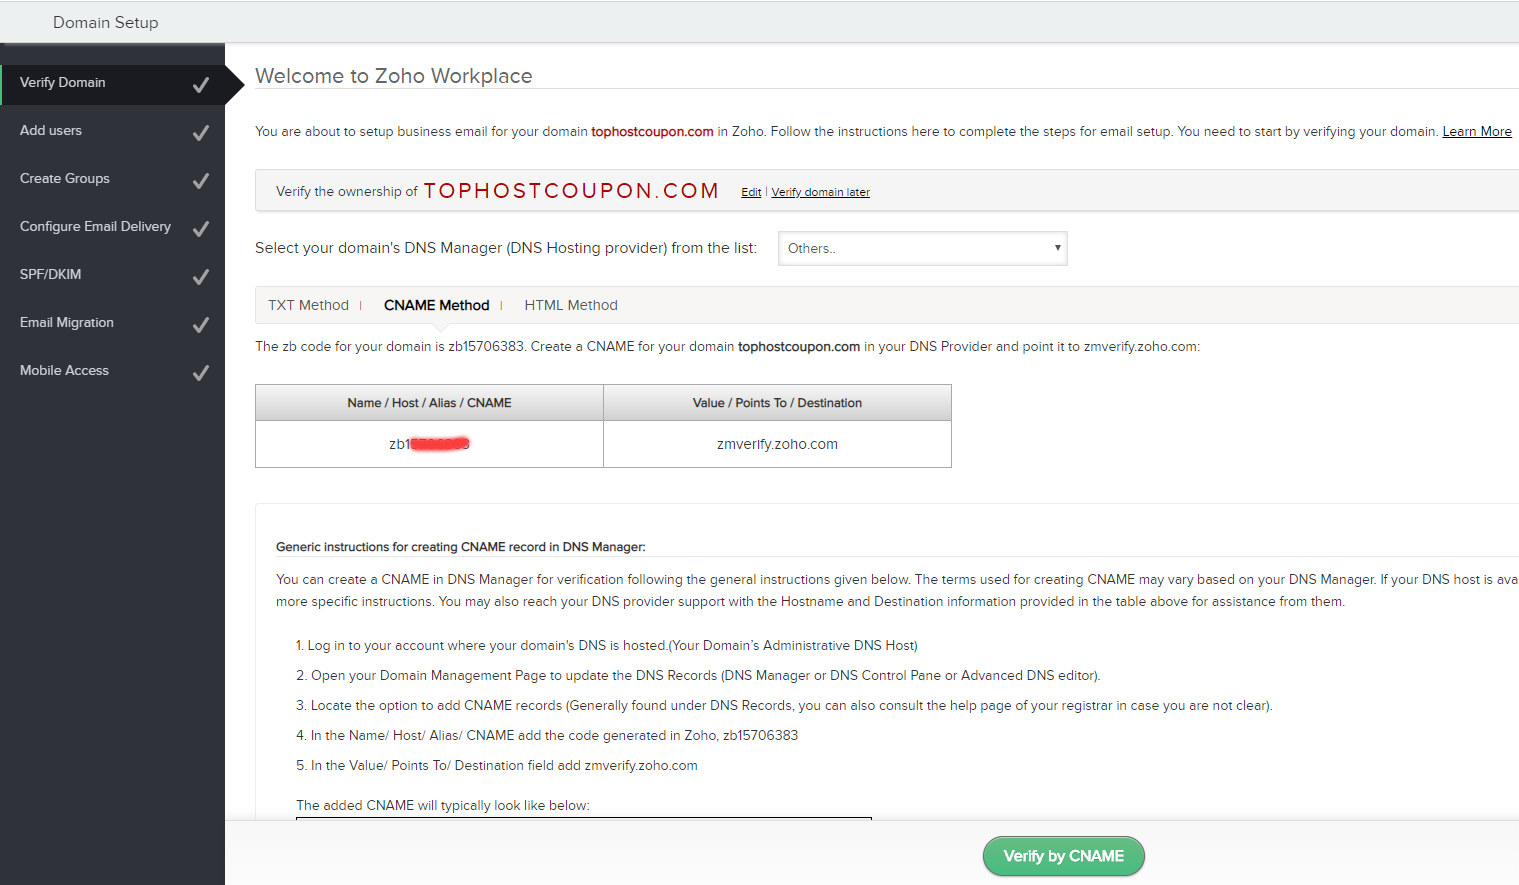
The system will redirect you to an authentication page, your job now is to edit the DNS records in the domain in accordance with their requirements. I will use the CNAME method to verify it.
Instructions to fix DNS:
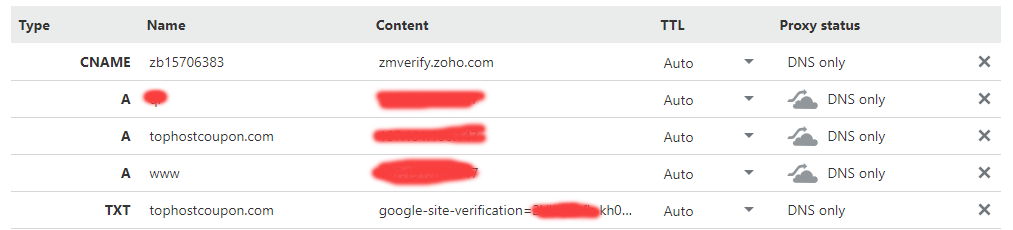
When the DNS is finished, you can wait for about 15 minutes and return to the authentication page of Zoho Mail, select “Verify” to finish.
Step 4:
After successful domain authentication, the system will ask you to continue creating an email account. Then another panel will appear and click Next.
Click Next twice to see the Proceed to Point MX button, click on it to start resetting the DNS for the domain because if you skip this step your email will not be able to receive an email if someone sends it to the address by name domain.
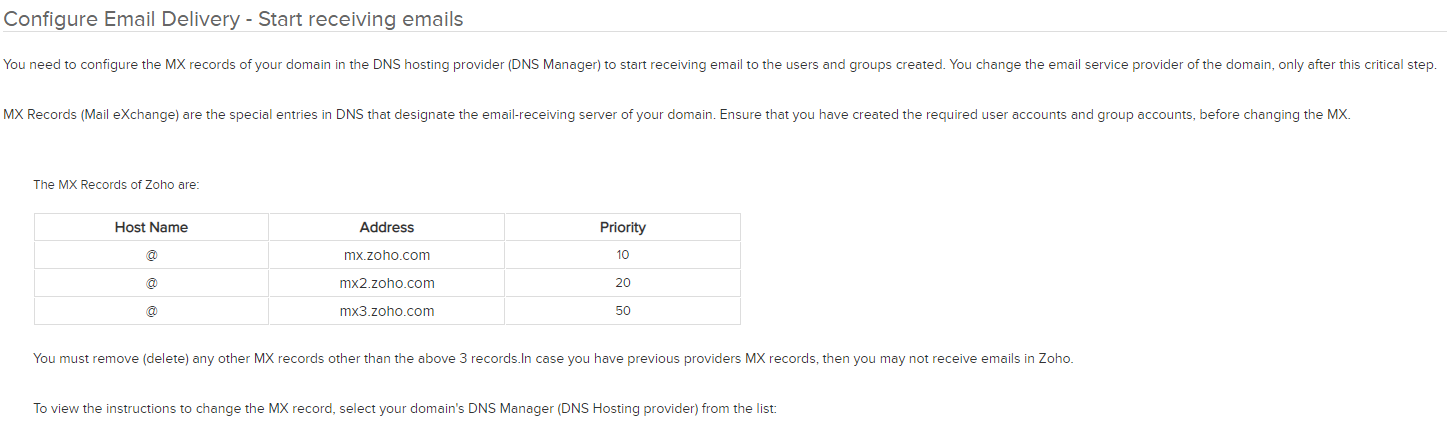
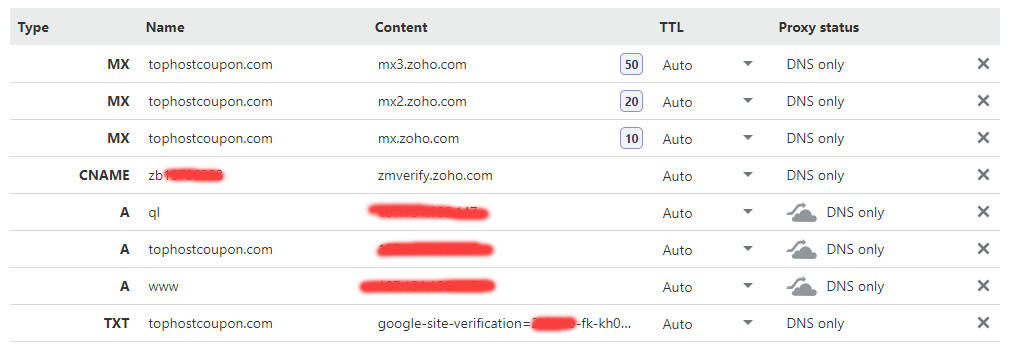
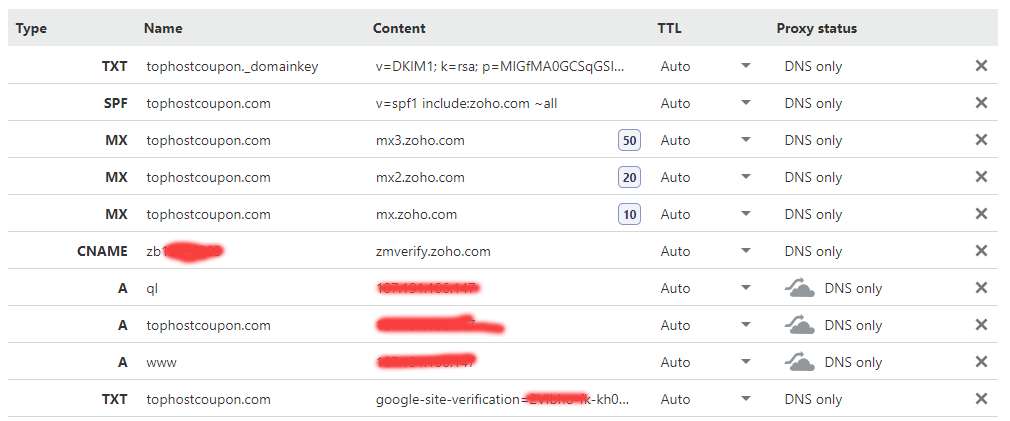
Then you add 2 MX type records to DNS with the following parameters:
After that, go back to the Zoho page, scroll down and press the Next button, and click Next if the following options are not needed. Finally, select “Done” to complete.
If you are using old MX records, delete them all before adding Zoho Mail MX records.
Then click on the link to log in to the email they provide you and you will be redirected to your main mailbox.
Step 5:
In this step, you can use other emails to send test emails to the email address you have created to see if there are any errors, where there is a need to correct or not …
If you get an error sending an email from Zoho but not receiving the email they sent, it is because the DNS is not fully updated. Please wait patiently, it may take up to 1 day depending on the email sender’s network.
You also need to point DNS for SPF and DKIM so that when sending the test does not get into Spam. The record will look like below.
Step 6:
If you need to create additional email for domain names, you can continue to follow these instructions.
- You access the Control Panel at the top of the menu.
- Access to the User Details and press Add User.
Just fill in the information for the user and start creating, no further setup for the domain is needed.
Note that keep the MX records in the domain, if deleted, you will not be able to receive emails.
Good luck to you!