After successfully installing WordPress on FASTPANEL, your website will need to be installed with an SSL certificate to increase security and help achieve higher scores on search engines. And in this tutorial, we will show you how to install Let’s Encrypt SSL on FASTPANEL.
Let’s Encrypt is a free, automated SSL certificate provider that works for the benefit of the community. It is managed by the Internet Security Research Group (ISRG). Let’s Encrypt provides webmasters with a digital certificate needed to enable HTTPS (SSL or TLS) for all the websites.
As mentioned in previous posts, FASTPANEL is a very good free web control panel at the moment. It has full features of a hosting control panel with many essential features such as:
- Create a website with just a few clicks.
- Email management.
- Database management.
- Manage backup/restore to the cloud.
- Create user.
- SSL support ( Paid SSL & Let’s Encrypt certificates)
- FTP support
- Supports multiple PHP versions.
- Integrated AI-BOLIT malware scanning.
- Integrated Spam Asasin.
How to install Let’s Encrypt on FastPanel?
To install SSL Let’s Encrypt for websites on FASTPANEL we follow these two steps.
Step 1: Access the FASTPANEL admin page
To access the FASTPANEL interface, we access the link in the form https://YOURIP:8888 on the browser.
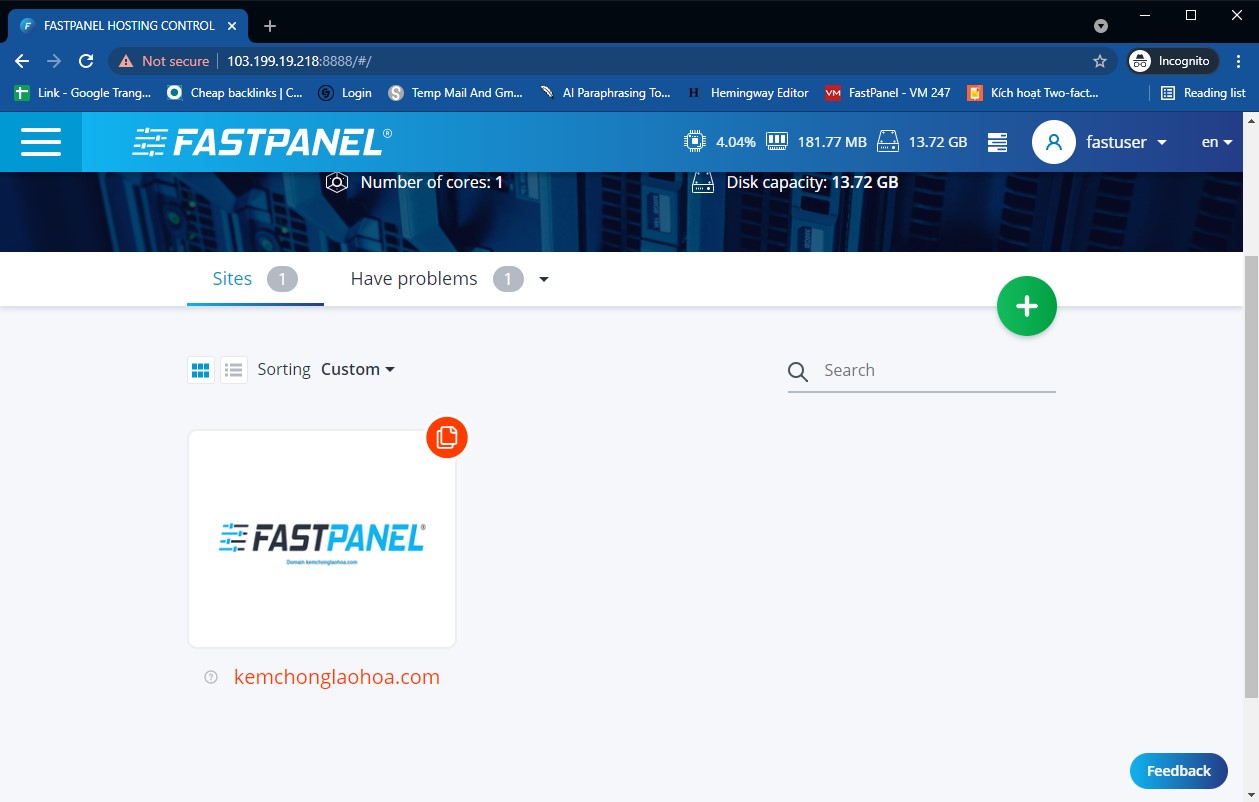
Step 1
Above is the FASTPANEL interface. We continue to the second step to install SSL Let’s Encrypt for the website on FASTPANEL.
Step 2: Install SSL Let’s Encrypt for websites on FASTPANEL
First, click on the website that needs to install Let’s Encrypt SSL.

Click on the Site card to access the website that needs to install SSL Let’s Encrypt.
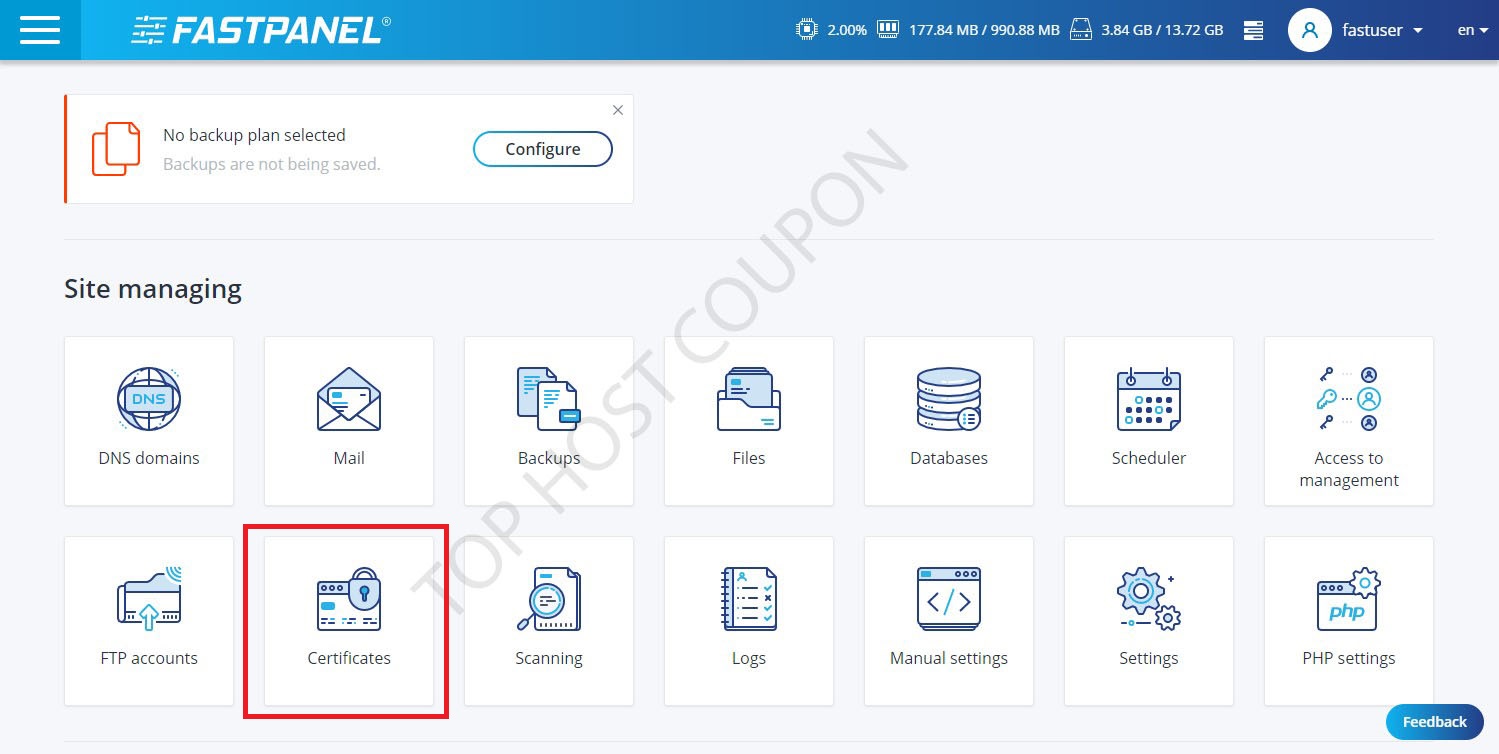
Next, click on Certificates
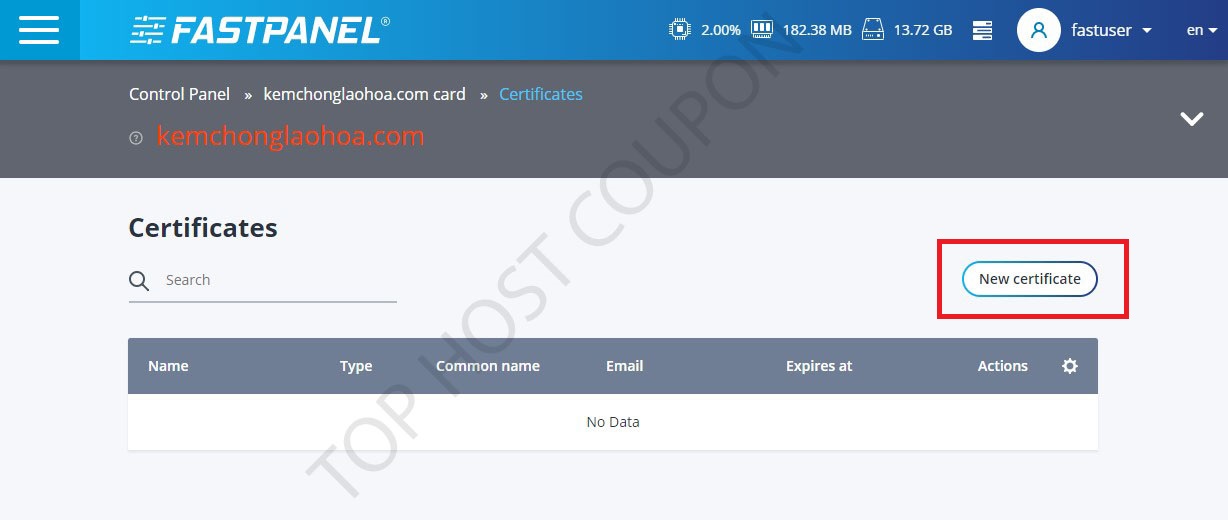
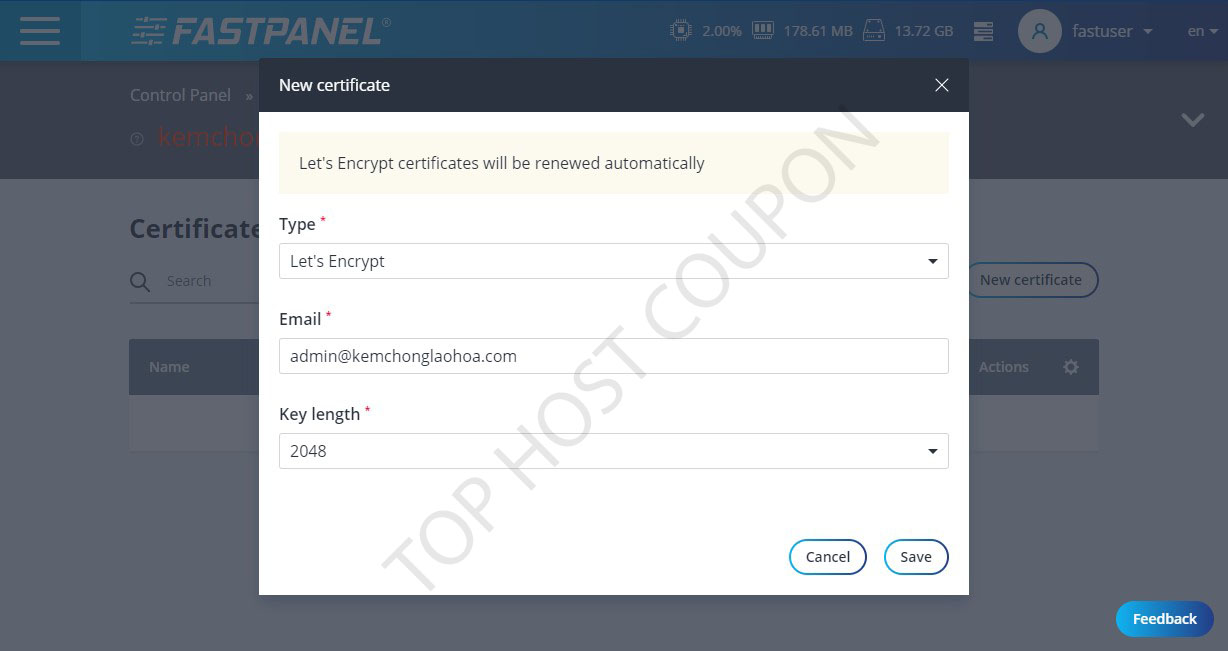
In the Type section, select Let’s Encrypt, enter your Email and click Save to start installing SSL.
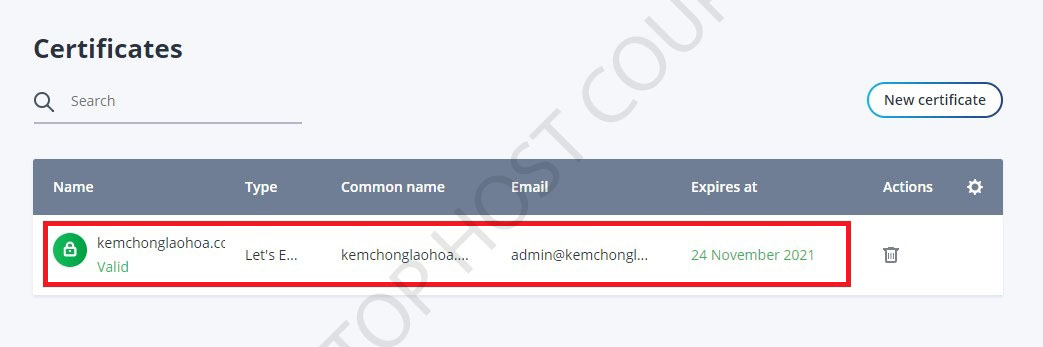
After successful installation, you will see a message like a screenshot below.
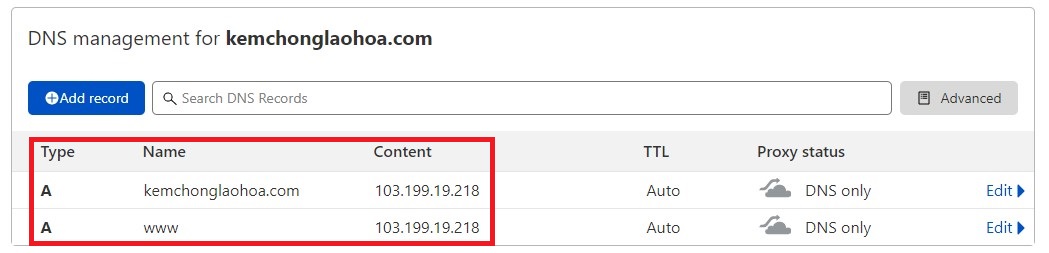
Note: In the current version of FASTPANEL, you need to point to the domain name as well as the www subdomain of the domain name to install SSL Let’s Encrypt.
Step 3: Check the certificate on the website
Now try to access the newly installed website again, you will immediately see the SSL lock icon, when you click on the SSL details, you will see that the SSL is issued by Let’s Encrypt.

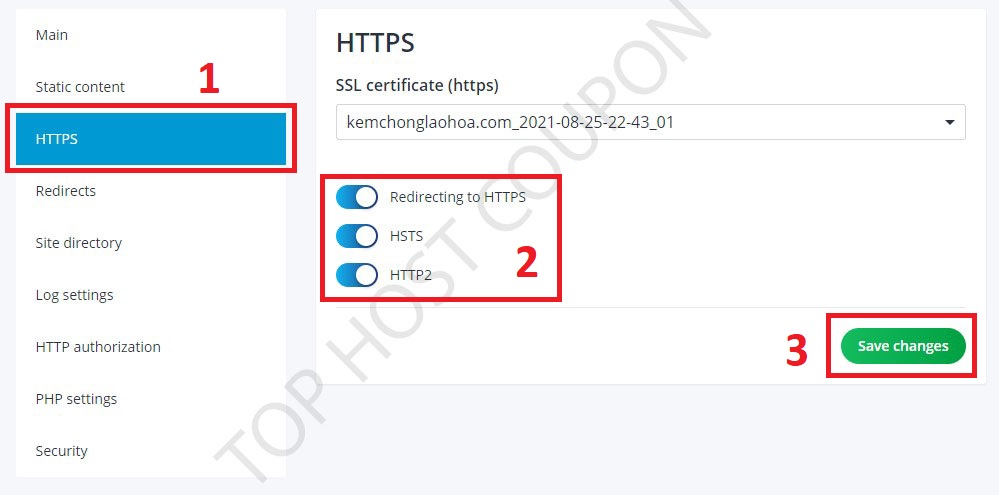
For WordPress, you should install the Really Simple SSL plugin to redirect your website to SSL or you can do it the following way in the Settings of FastPanel.

In the HTTPS settings section, do the following:
- Enable Redirecting to HTTPS
- Enable HSTS
- Enable HTTP2
So you have done all the steps to install SSL Let’s Encrypt for the website on FASTPANEL. Good luck! If you need help, leave a comment below this article!