The previous article, you know how to activate Memcached at HawkHost. Memcached and Redis are included in the new section called cPanel Application Manager. In this article, we will show you how to enable the Redis Cache at HawkHost.
What is Redis Cache?
Redis Cache is a cache system that stores data on RAM. So it helps increase website speed up a lot compared to accessing data from the hard drive.
Redis and Memcached have many similarities. They all belong to the NoSQL database family, storing data on RAM. Memcached was born in 2003.
Redis was born later in 2009. So it’s not surprising that Redis is stronger than Memcached.
Enable Redis on HawkHost
Step 1: Turn on the Redis cache
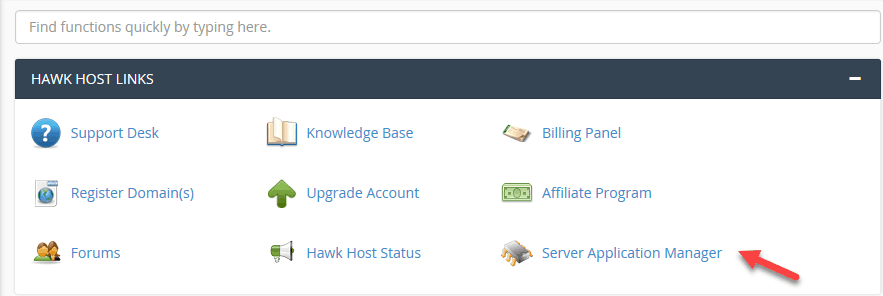
Open HawkHost’s cPanel. Go to the Hawk Host Links section, click on Server Application Manager:
Next, click on the Enable link to turn on the Redis server.
The server startup process takes at least 5 minutes. As soon as Redis finishes booting, you will see the status as Online
Step 2: Turn on the Redis module
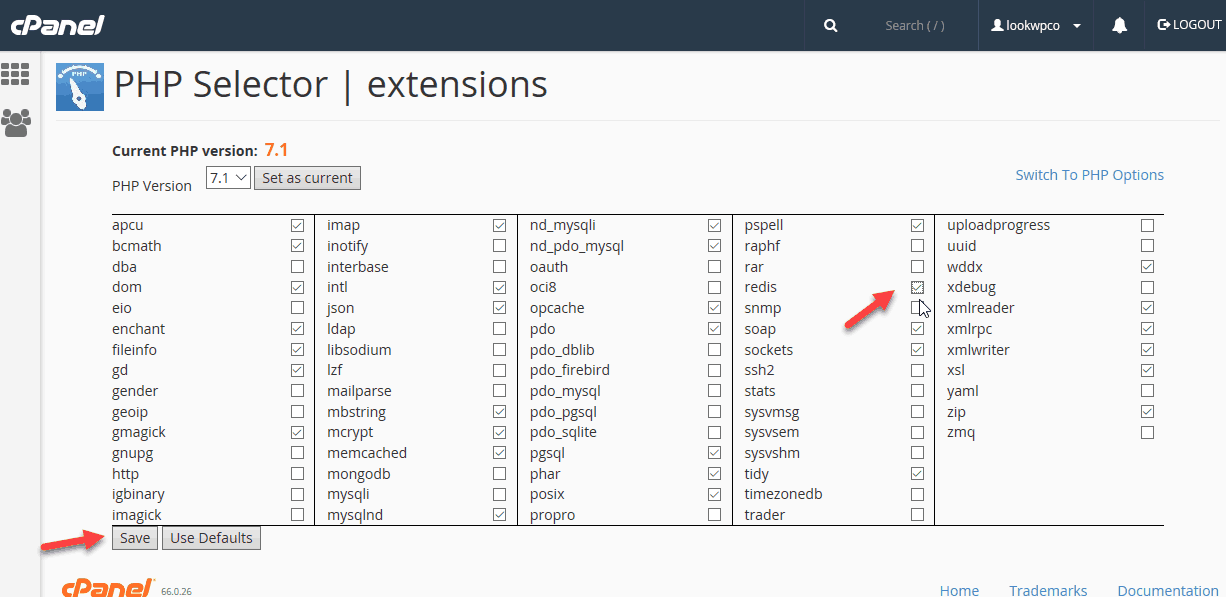
In order for PHP to connect to the Redis server, you need to turn on the Redis module.
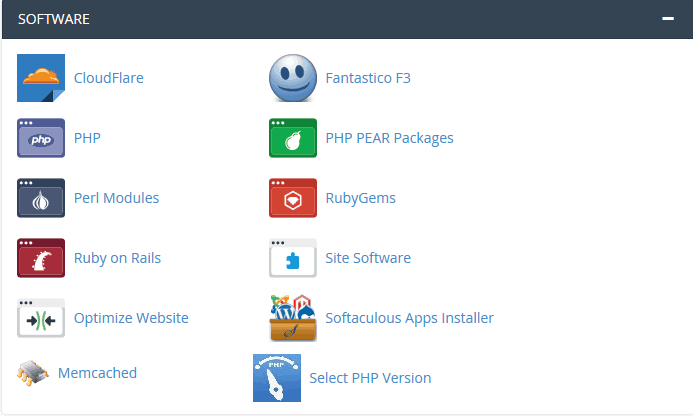
Also in cPanel of HawKhost, you go to the Software section. Click link Select PHP Version.
Next, click on the Redis option. Click Save to save the configuration:
Step 3: Install WordPress plugin
You need to install and activate the Redis Cache plugin.
As soon as the plugin has been activated, open the wp-config.php file and add the following line:
define('WP_CACHE', true); define('WP_REDIS_SCHEME', 'unix');
define('WP_REDIS_PATH', '/home/lookwpco/.applicationmanager/redis.sock');
Replace Redis Path with your value (found in Server Application Manager).
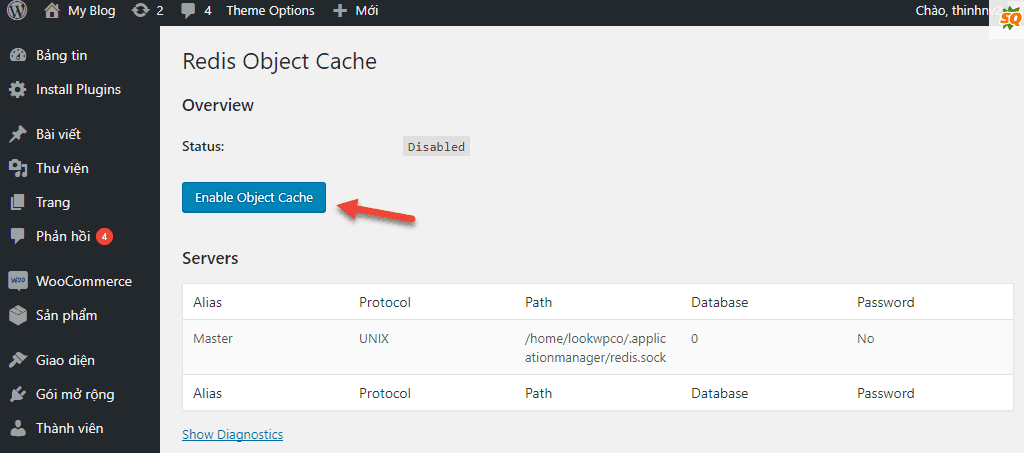
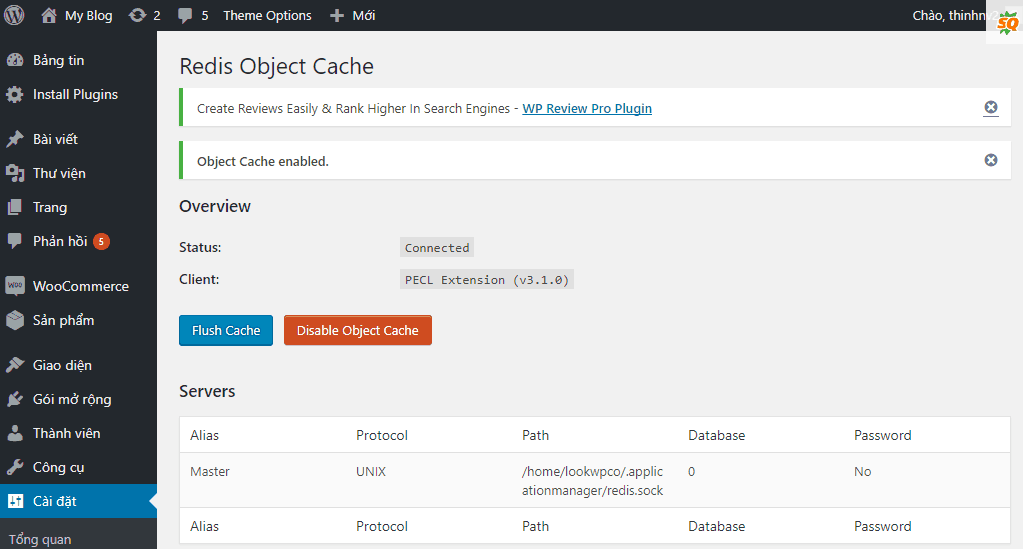
Now go to Settings -> Redis, click on the Enable Object Cache:
If the status is connected, you have successfully installed Redis.
Use the W3 Total Cache plugin
Many people recommend using W3 Total Cache for shared hosts because this plugin is a bit heavy and complicated. But if you are using W3 Total Cache and want to take advantage of HawkHost’s Redis Cache feature, here’s the guide:
Go to General Settings, select Page Cache. In the Page Cache Method section, select Redis. Click the Save Settings & Purge Checks button.
Do the same for the Object Cache, and Database Cache sections.
Because HawkHost uses the UNIX socket to connect to the Redis server, you need to configure the connection configuration.
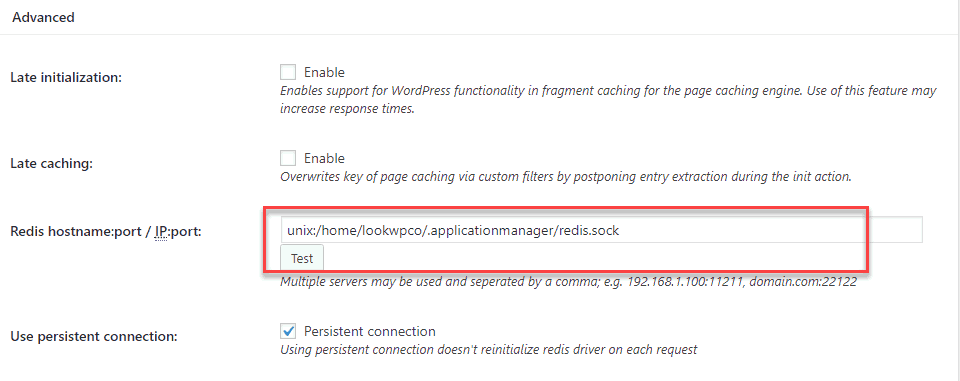
Go to Page Cache, scroll down to the Advanced section. In Redis hostname: port / IP: port . Enter the value below (remember to replace your Redis Unix socket path with your value):
Click the Test button to make sure that W3 Total Cache is connected to the Redis Server. You will see the message “Test passed”. Click the Save Settings & Purge Checks button.
Go to Object Cache and Database cache to edit connection information like Page Cache. Remember to click the Save Settings & Purge Checks button after the change.
You finally know how to activate Redis cache and use it. Good luck.

