In the previous article, we showed you how to install Sentora on CentOS 7. However, Any hosting management software needs File Manager to make it easier to upload, download and manage the files. And Sentora is the same, but you need to manually install it because Sentora doesn’t have File Manager available.
This is the easiest way to install the File Manager for Sentora.
Instructions for installing File Manager for Sentora
Top Host Coupon would like to guide you with the File Manager Sentora tool called ELFilemanger, which is very useful and convenient.
Install File manager for Sentora:
- First, You need to use Putty to log in to the server.
zppy repo add zppy.github.io
zppy update
- Then Install File Manager module:
zppy install filemanager
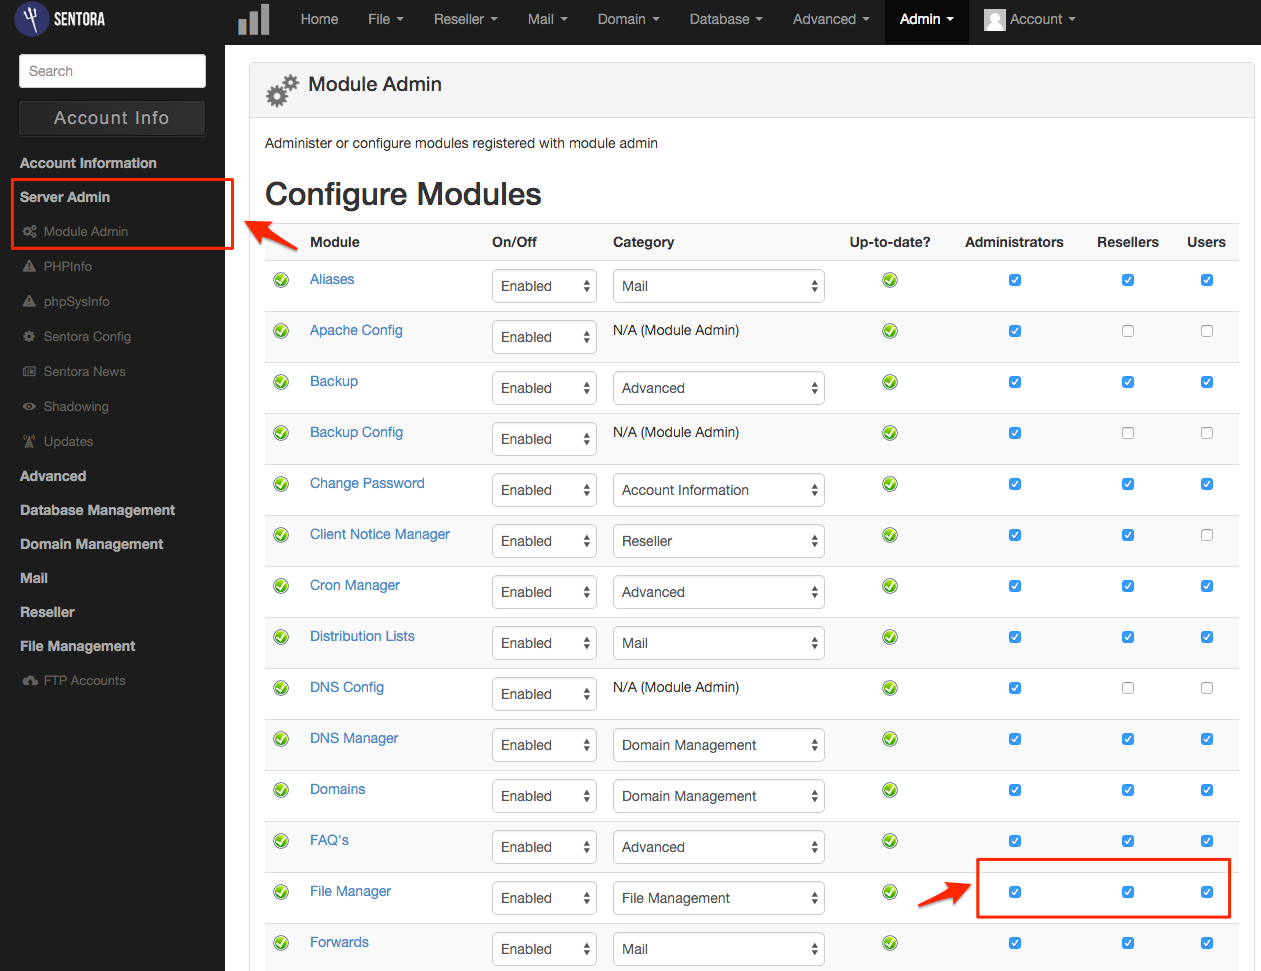
- Next, You need to go to the Admin page, Follow as shown below to enable File Manager for all user groups. Click Save changes to save the changes.
Finally, you can directly access your hosting management link to complete the installation of File Manager.
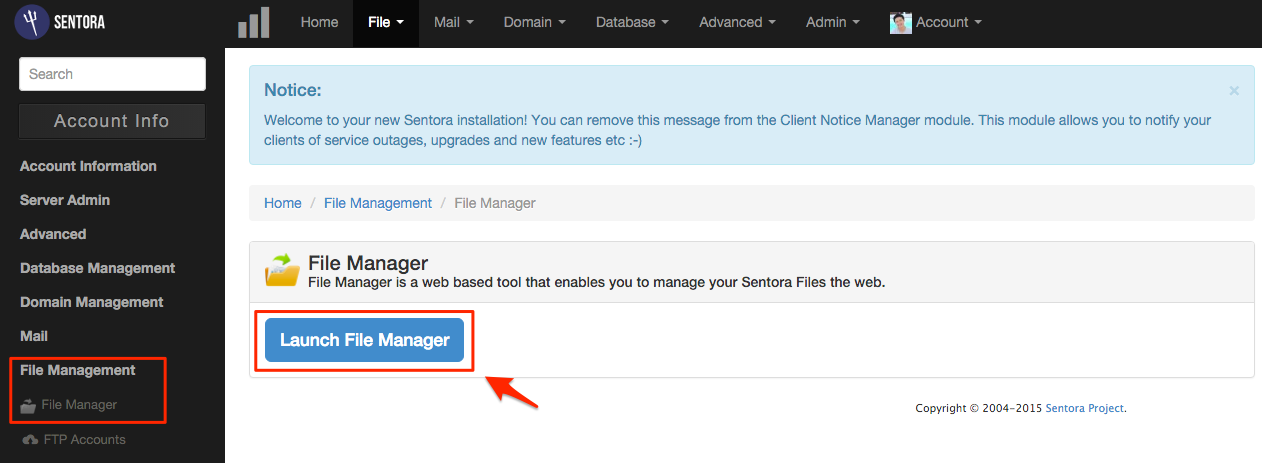
From now on, in File Management next to FTP Accounts you will see one more tool called File Manager, click on Launch File Manager it to start using.
Above is a detailed guide on how to install the File Manager for Sentora. If you need help please leave a comment right below this article.


