PuTTY is understood as software used to control the server via the internet, It supports many network protocols, including SCP, SSH, Telnet…
PuTTY was originally written specifically for the Windows operating system, But now it has been written for many other operating systems such as Unix, MacOS, Symbian, Windows Mobile, and Android operating systems.
In this tutorial, we will use Putty to connect SSH to a VPS server. This software will connect to the remote server via SSH terminal and execute the command from the command line in the interface of Putty SSH Client.
You will need to prepare something
- A computer using the Windows operating system
- Use Putty SSH client to install on your computer
- SSH connection information
- A VPS running Linux operating system ( CentOS, Ubuntu, Debian…). You can buy at Contabo or Vultr free $100 credit
Step 1 – Download Putty SSH client
You can download the latest version of Putty SSH client here. Install on your computer and start using Putty.
Step 2 – Instructions for using Putty
Run the putty ssh client file you downloaded in the Prepare step.
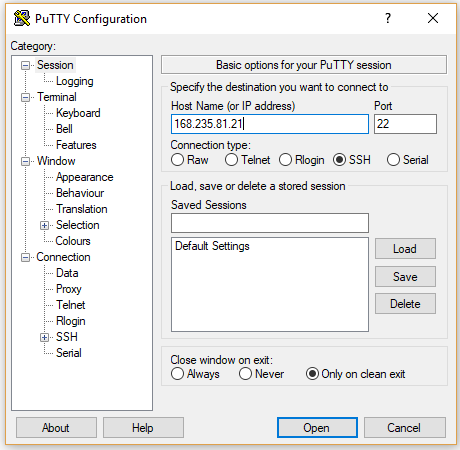
Enter the information ( Your IP Address ) in Host Name, and click the Open button to proceed
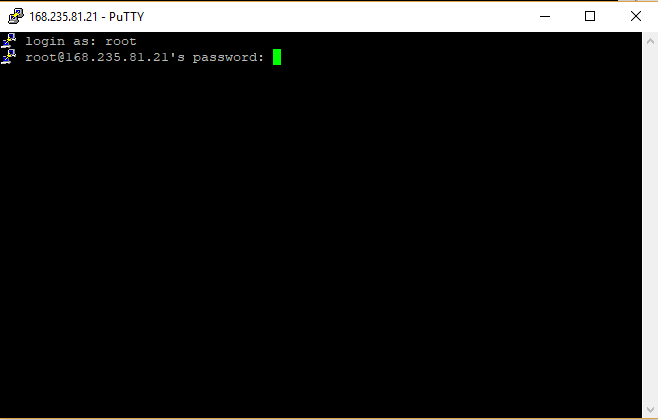
First, you will see the Login as the request, here enter the username you want to connect to the server, in this tutorial, we use root as the username, allowing you to access the server with the highest permissions. After entering the username, press Enter.
Next, You will enter the root password. When entering a password, you will not see any changes and when you enter it, just press ENTER.
Finally, you will easy to manage your VPS with Putty.


