You need to use Pinterest to analyze your WordPress site but don’t know how to verify your website on Pinterest? Let TopHostCoupon help you with this article.
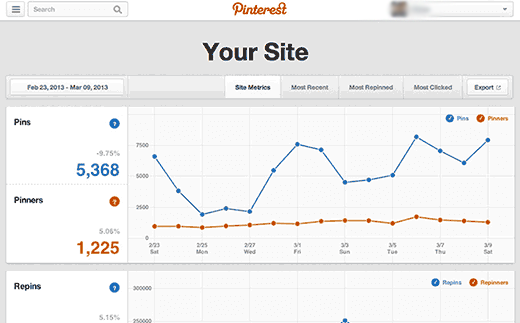
The analytics will help you to monitor website performance by showing statistics for all images on the website. Recently, we received a request from some of you for instructions on how to verify their WordPress site on Pinterest. In this article, we will show you how to verify a page on Pinterest and how it is analyzed by Pinterest.
Get the Pinterest verification code for the website
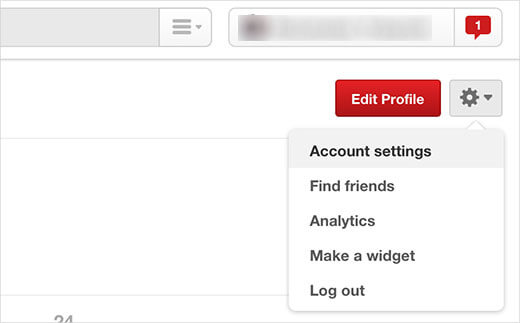
The first thing to do is log into your Pinterest account and click on your username. At your website, tap the gear icon in the upper right corner of the screen and then go to account settings.
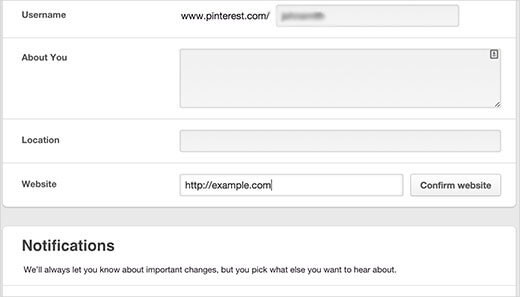
On the account settings page, scroll down to find the Website field. Enter the website URL and then confirm.
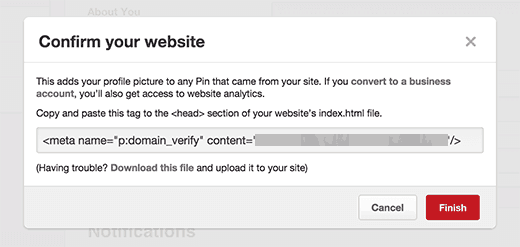
A popup will appear on the screen with a code snippet. This code is a meta tag that you need to add to the top of your web page. Simply copy it and don’t close the window as you will need to come back here to complete the verification.
Add Pinterest Verification Code to your WordPress website
There are two ways to add meta tags to a WordPress site. You can paste this code directly in your theme’s header.php file just before the </head> tag.
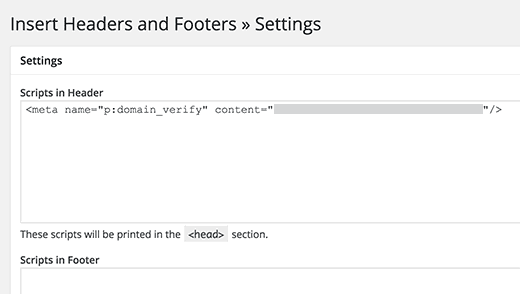
Another easy way to add code to your website is to use the Insert Headers and Footers plugin. Simply install and activate the plugin and visit the Settings » Insert Headers & Footers page. Next, paste the Pinterest verification code in the header and save your changes.
Next, go back to the Pinterest verification page and click the Finish button. You will see a success message.
You will now see Pinterest Analytics verifying your site, and how it is performing on the Pinterest network. You can also add a Pinterest Pin button to your website to increase user engagement.
We hope this article helped you verify your WordPress site on Pinterest. Good luck to you! Need helps, please leave a comment!

