While previously I had an article introduced about Install LEMP on CentOS, but after using it for nearly a year, I found that this is a very good NGINX Web server for WordPress, so I will write a full series to guide you to install and use EasyEngine.
What is EasyEngine?
EasyEngine is a Python script that automatically installs NGINX, MySQL, PHP 7 and many other utilities with just one command line. EasyEngine only supports Ubuntu / Debian. It does not support CentOS.
EasyEngine is not a control panel. Every operation with EasyEngine takes place via the command line. But rest assured that EasyEngine’s commands are easy to remember and use.
Some outstanding features of EasyEngine:
- Installing NGINX, PHP 7 and MySQL easily
- Add domain names and install WordPress with just one command.
- Preset Redis Cache, Memcached
- Let’s Encrypt certificate is also installed with just one command. Automatically create renewed cron jobs as soon as creating certificates. You have to stop creating cron jobs.
- Automatically install and configure the cache for WordPress including WP Super Cache, W3 Total Cache, Redis Cache, and ngx_fastcgi_cache
- Install phpMyAdmin and many other administration utilities
- Install WP-CLI to administer WordPress via the command line.
- NGINX configuration for WordPress multisite
To avoid many questions later, I encourage you to take a look at some of the following notes before starting to follow this series to use EasyEngine for the server to run WordPress.
- NGINX does not use .htacces
- Use EasyEngine 100% via the command line, this is a script rather than a control panel.
Prepare
- A Linux server using Ubuntu 12/14 or Debian 7 or higher. You can buy a VPS at Ramnode, Linode or VPSDime but I recommend you try Contabo VPS service.
- RAM memory is at least 1GB.
Ok, if you’re ready, check out the next post to install EasyEngine.
How to Install EasyEnine
Before installing EasyEngine script on the server, please make sure that the server has not installed any software, or has not installed MySQL Server. In short, a completely new server.
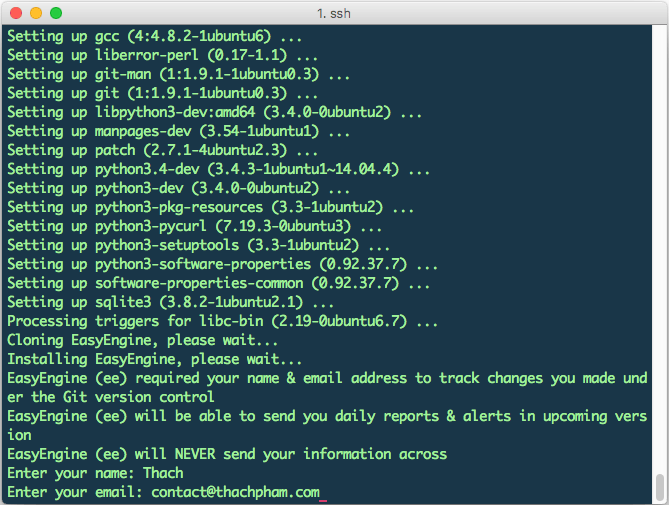
The installation of EasyEngine also takes place very quickly, first we proceed to clone EasyEngine script from their repository and install the script with the following command.
$ apt-get update && apt-get install sudo ca-certificates -y && wget -qO ee rt.cx/ee && sudo bash ee
It will ask you to enter your name and email (these 2 parameters will apply when you later install a new WordPress website).
After installing EasyEngine, you will see this message.
For EasyEngine (ee) auto completion, run the following command
source /etc/bash_completion.d/ee_auto.rc
EasyEngine (ee) installed / updated successfully
EasyEngine (ee) help: http://docs.rtcamp.com/easyengine/
Now you have installed the core part of EasyEngine.
EasyEngine has a WordPress installation command. When you run this command it will automatically install necessary components like NGINX, PHP, MySQL, and many other things.


