My article helps you how to create a VPN server to use by yourself, not to share with others, so you do not have to worry about slowing down the connection. I often use this VPN to access some websites that limit Vietnam’s IP, and also to use when our country’s fiber optic cable is broken (when there is VPN, the network traffic will take a detour, not go by fiber optic cable. should be disconnected faster than when connecting directly).
Instructions on how to create your own VPN, only $ 5 / month
First, you need to register a VPS at Digital Ocean. Create your VPS with the Digital Ocean promo code, so you will get 1 month for free (it gives $ 50 to use in 30 days), but if you register yourself, it will not work.
If you do not use Digital Ocean, then you can create a VPS on Vultr.com or you can create on Google Cloud and Amazon AWS but remember to open the port.
I chose the Digital Ocean because it’s simple.
After registration is complete, we will create a server to install the VPN on. You go to the green Create button on the edge of the screen, select Create Droplet (droplet is essentially the definition of Digital Ocean on a virtual server, not at all).
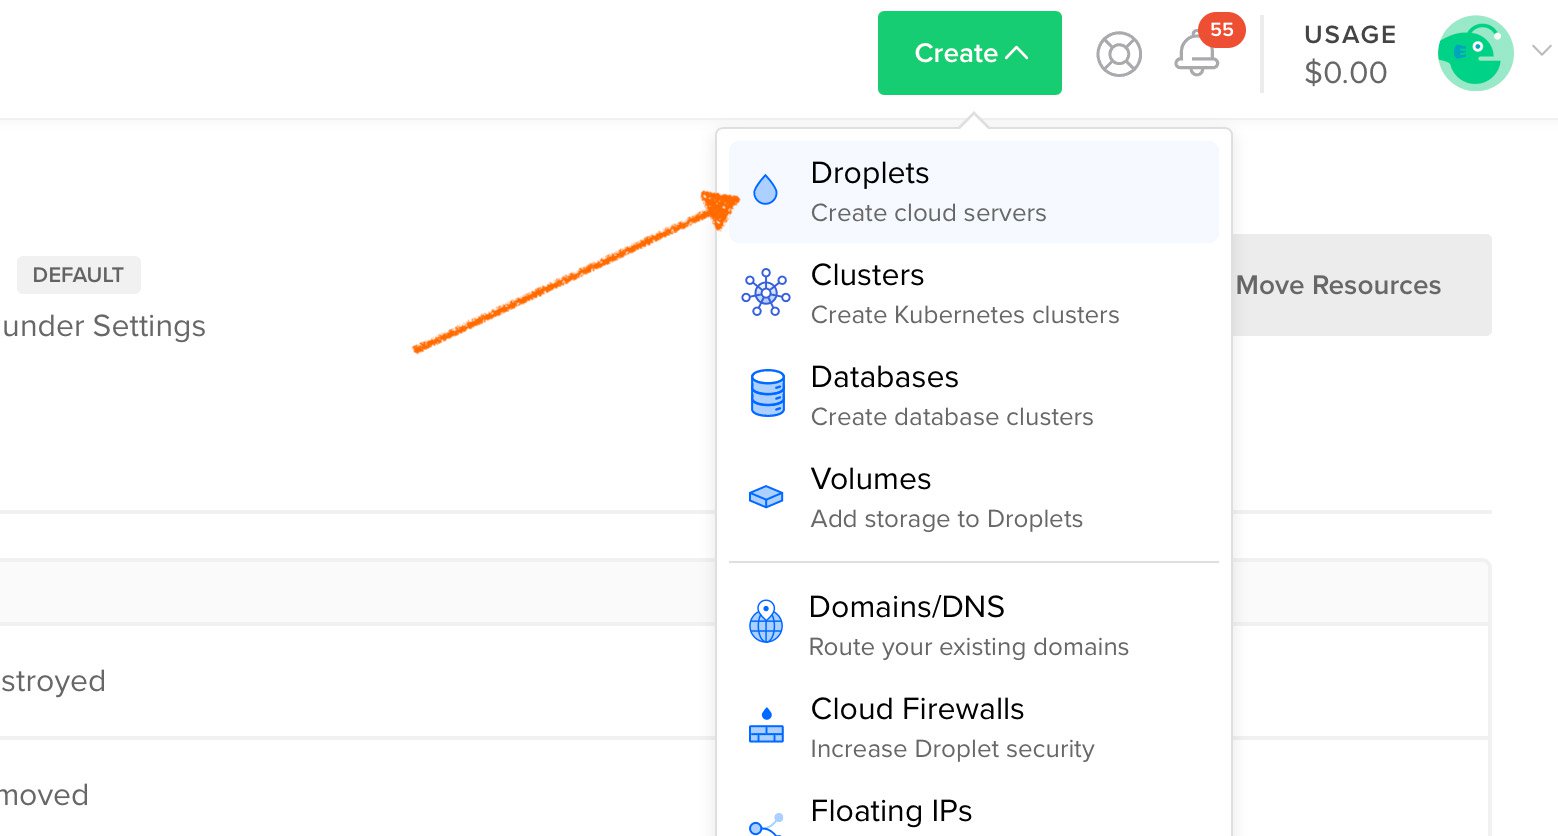
In the next step, you choose the operating system is Ubuntu 18.04, choose the cheapest configuration (1 CPU, 1 GB RAM, the price only $ 5 / month), select the region that is the country you want, and finally give your server a name you want.
After clicking Create, you wait a bit for the server to be started. About 2 minutes later, an email will be sent to you about the server login information, in which the account name is root and the password will be a long string.
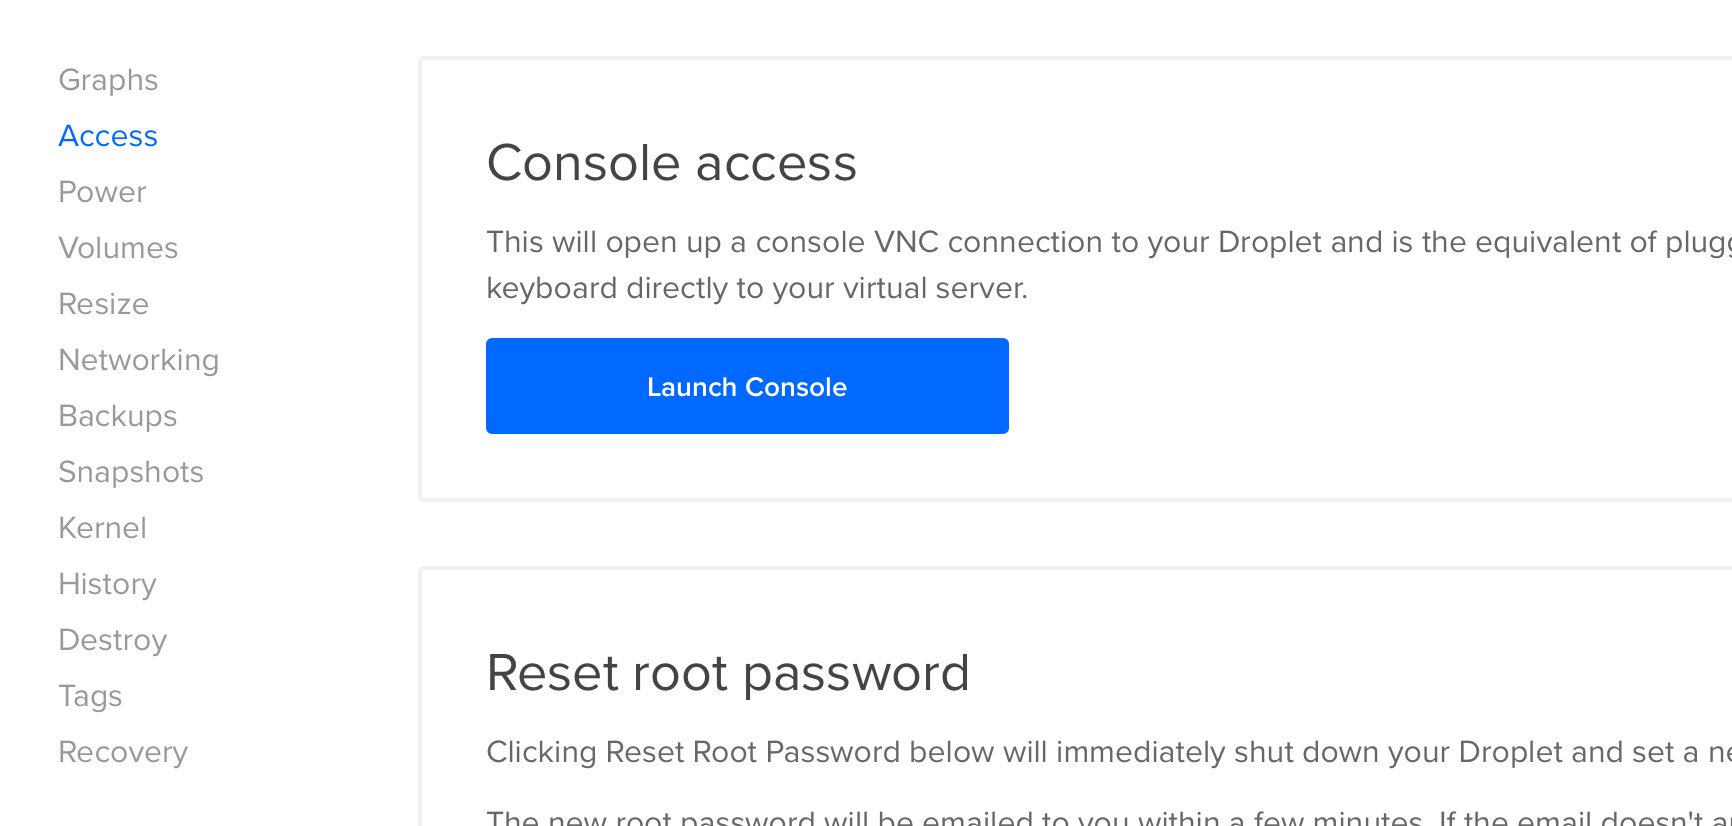
We will then log into the server. On the interface of Digital Ocean, if you refresh the page, you will see your newly created server appear. Select it> Access> Launch Console.
Wait a moment, you’ll see a black screen appear. In that screen, press any key on the keyboard to activate the Terminal interface (the command line driver used with the newly created server). When asked for the login information, enter the user as root, and the password is the messy email.
Note: when entering the password, the word will not appear, but actually there is recognition there. Enter finished and press Enter.
The first time you log in, the server will ask what “Current password” is, retype the email. Then the computer will ask to set a new password, you can set any password you feel familiar with.
Now that we have configured the server, we will continue installing the VPN. The installation is extremely simple, you just need to type the following command, press Enter and wait.
wget https://git.io/vpnsetup -O vpnsetup.sh && sudo sh vpnsetup.sh
When the installation is completed (takes about 5 minutes), the following information will appear on the screen.
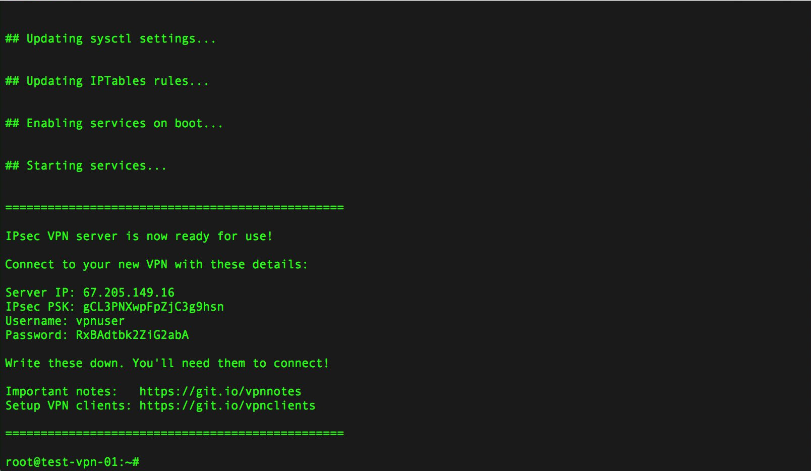
Make notes about this information in Evernote or any of your note-taking apps. The Server IP part is the address of the VPN server, PSK is called the private shared key (roughly as another password layer of the type of VPN we use – the L2TP protocol), the username and password are clearly familiar.
Now it’s time to connect your computer and your phone to the VPN server you just created. That part has not changed compared to my old post, so I will copy it for you to reference.
How to connect devices with VPN (OS X, Windows, iOS, Android)
VPN uses L2TP + IPSec security. This is a protocol supported by many operating systems, even available but you do not need to install anything. Here I only guide with 4 popular platforms, other OSs, you guys will be curious. Usually, the VPN setting will be in your settings.
Windows 10 and other:
- Right-click the network icon in the clock bar
- Select Open Network and Sharing Center> Set up a new connection or network
- Select Use my Internet connection (VPN)
- Enter the IP address of your server, and the Destination name box, enter what you like. Click Create
- Right-click the network icon, select Open Network and Sharing Center again
- On the left-hand panel, select Change adapter settings. Right-click on the newly created VPN> Properties
- Switch to the Security tab, select Layer 2 Tunneling Protocol with IPsec (L2TP / IPSec)
- Click the Allow button, continue to “Challenge Handshake Authentication Protocol (CHAP)” and uncheck the rest
- Click the Advanced settings button> Use preshared key for authentication> enter your VPN password (in the example above is tinhte1234)
- Click OK to close all windows
- Find the Command Prompt application, right-click on it, select “Run as administrator”, then enter the below command (you can copy and paste). Reboot the computer.
REG ADD HKLM \ SYSTEM \ CurrentControlSet \ Services \ PolicyAgent / v AssumeUDPEncapsulationContextOnSendRule / t REG_DWORD / d 0x2 / f
From now on, you can connect to the VPN by clicking the network icon> selecting your VPN> Connect. You will be asked for a username and password.
Mac OS X
- Open System Preferences> Network.
- Click the + in the upper left corner
- Choose VPN
- Select L2TP over IPSec in the “Type” box
- Enter something in the Service Name box> click Create
- Enter the server’s IP address
- Enter the username of the server
- Click the Authentication Settings button
- In the User Authentication section, select the Password box, enter your password
- Under Machine Authentication, select the Shared Secret box, and enter the password again
- Click OK, select the “Show VPN status in menu bar” box
- Select Advanced> check the Send all traffic over VPN connection box
- Click OK, then Apply
From now on, you can connect to the VPN by clicking the VPN icon on the menu bar (located at the top of the screen)> selecting your VPN> Connect. If you are unable to connect to the VPN for the first time, then you should try it a few times.
Android
- Run the Settings application
- Select More> Wireless & Networks> VPN
- Select “Add VPN Profile” or the + sign
- Enter something you like in the Name box
- In the Type box, select L2TP / IPSec PSK
- In the Server box, enter the server’s IP address
- In the IPsec PSK (or Pre-shared Key) box, enter your password
- Click Save
- Select the newly created VPN
- Enter your username and password
- Click Save
- Click Connect
iOS
- Go to Settings -> General -> VPN.
- Select Add VPN Configuration…
- Select Type> L2TP
- Back, in the Description box, enter a name of something you like
- In the Server box, enter the server’s IP address
- In the Account box, enter the username of the VPN
- In the Password box, enter your password
- In the Secret box, enter the password again
- Select the “Send All Traffic” line, make sure the switch is green
- Click Done
- Connect to the VPN
Test your VPN IP with this website: https://ip2location.com