As you know, FASTPANEL is one of the free, popular control panels that can be installed on both CentOS and Debian.
After installing FASTPANEL, you will come to the first step to install the website on this control panel. WordPress is the most popular source code today that can be used for many purposes. And in this tutorial, We will show you how to install WordPress on FASTPANEL.
FastPanel has all the necessary features of a Hosting Control Panel:
- Create a website and install WordPress with just a few clicks
- Email management.
- Database management.
- Manage backup/restore to the cloud.
- Support File Transfer Protocol (FTP)
- Create user.
- Two-factor authentication is supported.
- SSL support.
- Firewall support.
- Supports multiple PHP versions.
- Integrated AI-BOLIT malware scanning.
- Supports command manipulation without SSH through the console.
- And there are many other features, I will mention in other articles.
Install WordPress on FASTPANEL
There are two ways to install WordPress on FastPanel that is manual installation and automatic installation using the WordPress auto-install feature when creating a website available in FastPanel.
To install it manually, you need to download the latest WordPress source code at: https://wordpress.org/download/ to your computer. Then use the File Manager or FTP feature to upload the source code to the hosting and then install it. It should be noted that you will need to create a website in FastPanel to have FTP and Database information and then install it manually.
However, this method for newbies is quite troublesome for newbies. Follow the simple way below to install WordPress on FastPanel.
Step 1: Access the FASTPANEL admin page and make a new website
To access the FASTPANEL interface, we access the link in the form https://YOURIP:8888 on the browser.
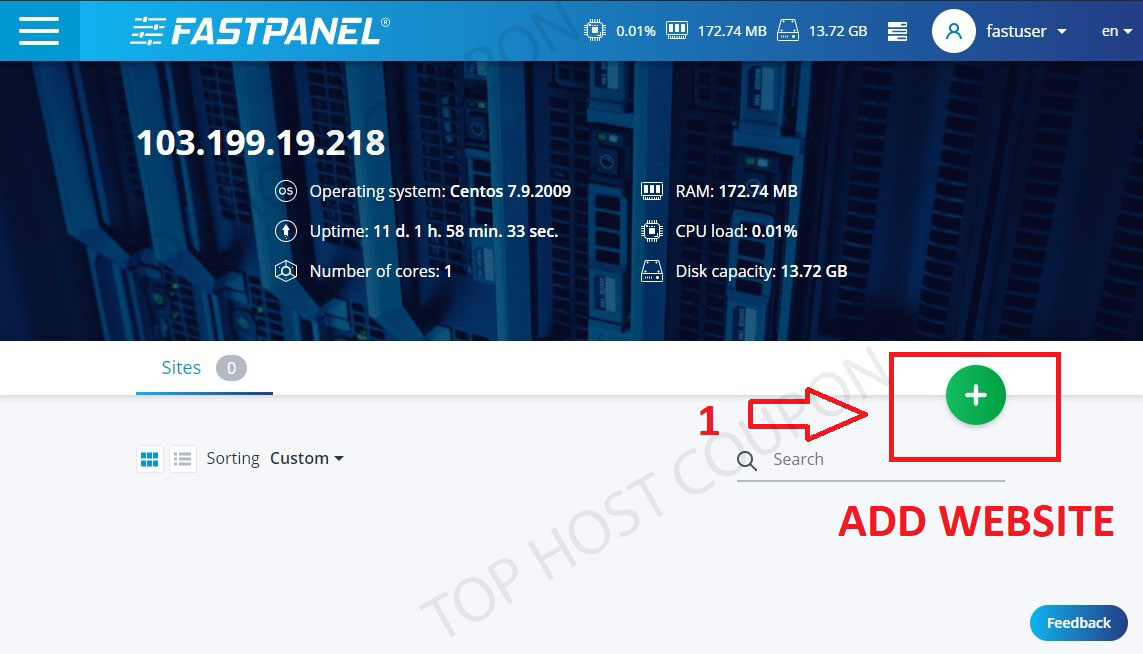
Below is my FASTPANEL interface. As well as how to add a new website.
Step 1
Step 2: Create a website
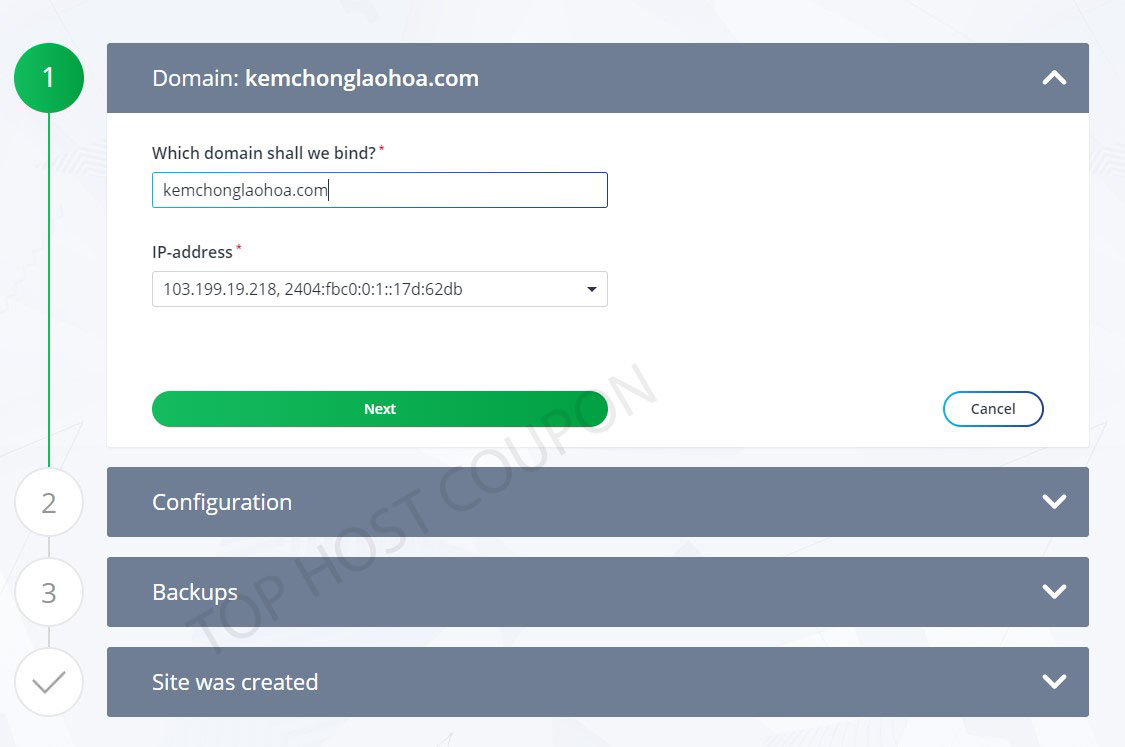
We select the green + sign in the right corner to add a new website. After selecting the add website button, we begin to fill in the domain name and click Next.
Step 2
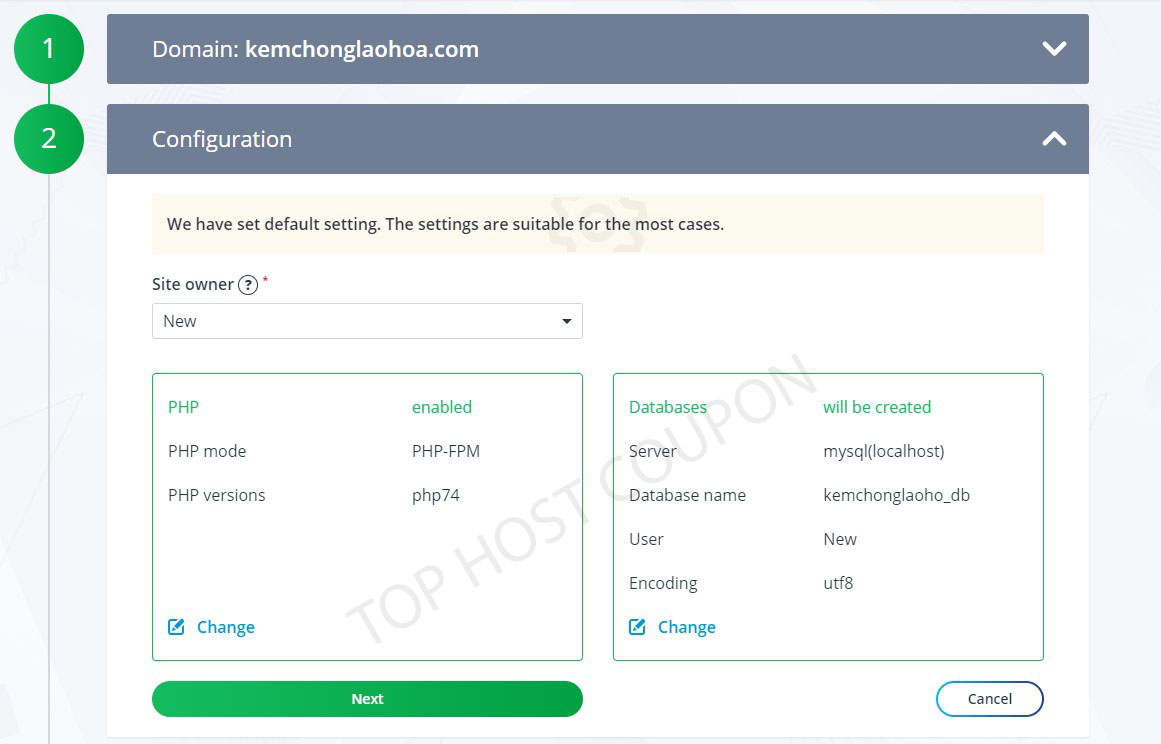
In the Configuration step, we will configure the PHP version, PHP mode, and database information to create. If you do not have a new PHP version, you should refer to install multi PHP versions on FastPanel.
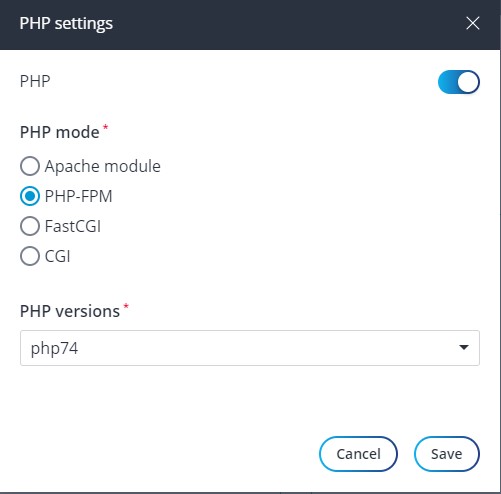
In PHP, we select the Change button below to display the box for detailed configuration.
Remember that the PHP support button must always be on, if you don’t turn on the source code, it won’t work.
Please select PHP mode as PHP-FPM and select PHP versions like PHP 7.4. Select Save to save and proceed to configure database information.
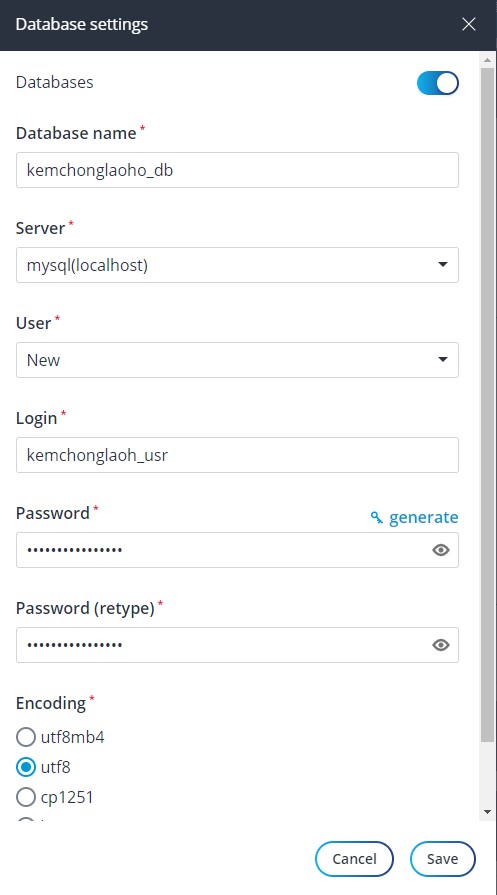
Here you can see the system automatically generate information like:
- Database Name
- Database User
- Database password
We need to save that so that when installing WordPress will need it. Select Save to save. At the next step you can choose: Do not create backup copies
Step 3: Install WordPress
At this last step, all settings and configuration information will be displayed for you to save. In addition, you also have user information created to administer this website only.
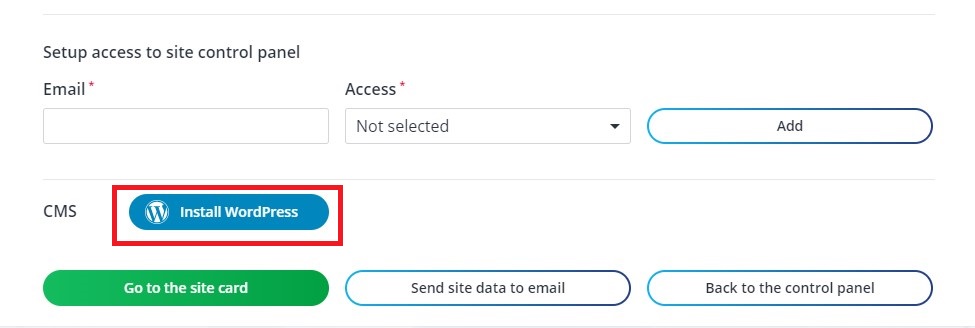
At this step, we will have a lot of information such as created database information, FTP information, administration information for this website hosting package.
But the button we need most here is the WordPress installation. Click this button and select WordPress website admin information as shown below and select Install WordPress.
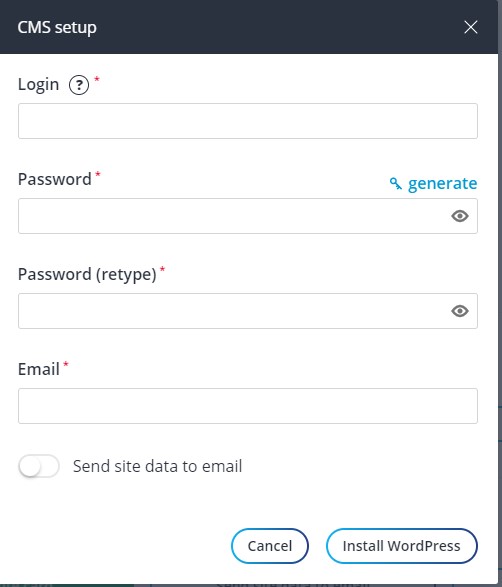
The next step you need to fill in the administrative information of the website is Admin username, password, and email.
The next step you need to fill in the administrative information of the website is Admin username, password, and email. Select send site data to email for administrative information to be sent to your email after installation.
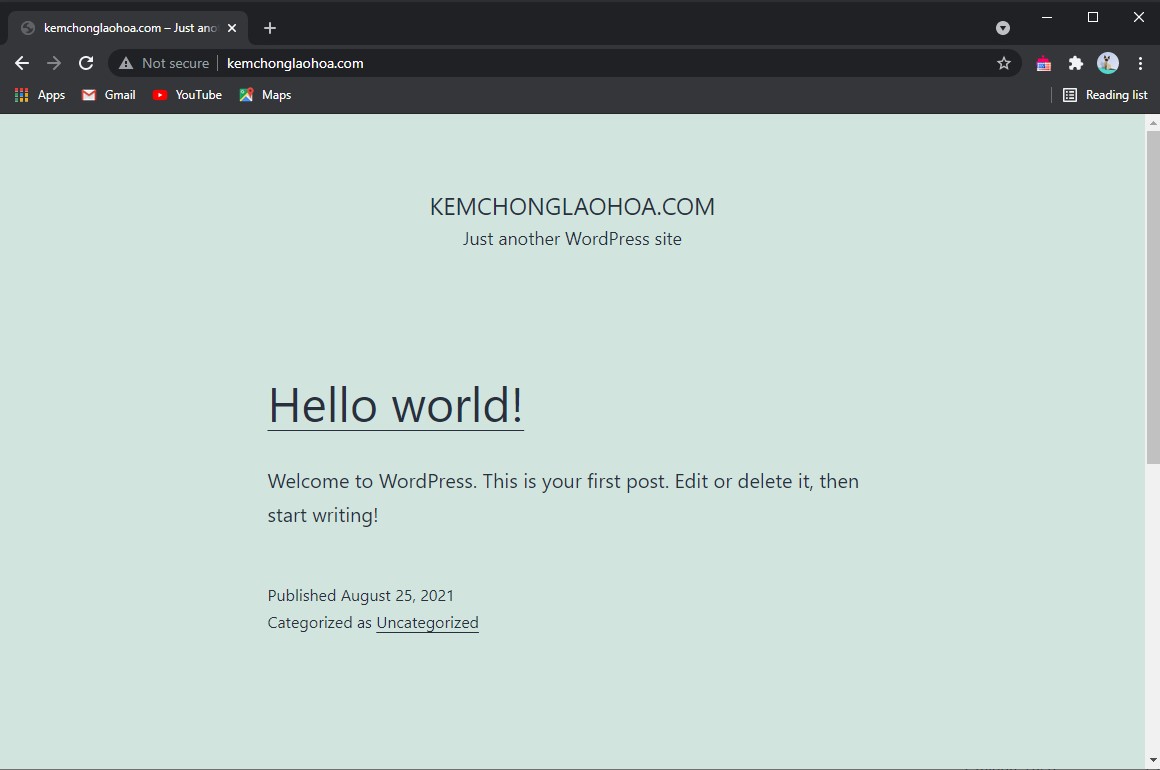
Finally, click Install WordPress to install successfully as shown in the screenshot below.
Through this article, you probably know how to install WordPress on FASTPANEL. If you have any problems, please leave a comment below the article for help.

