Today, installing SSL for websites has become a basic security standard to ensure the safety of data and user information. This article will guide you through 3 popular and easy ways to install SSL for VPS Vultr to effectively protect your website.
***You can get free $200 Vultr credit on this link.

Requirements to install SSL for VPS Vultr
The requirements for installing SSL on a Vultr VPS may vary depending on the service package you use and the method you choose. However, in general, you will need to prepare the following:
- Vultr VPS: Operating system installed (Linux, CentOS 7, Ubuntu, etc.)
- Access: Root/admin account or sudo user account.
- Web server: Apache, Nginx, Lightspeed,…
- SSH connection software: PuTTY or similar software.
- FTP access software: FileZilla or similar software.
- Web control panel: cPanel , Directadmin, FastPanel, CyberPanel..
Note:
- Not all of the above elements are required for the 2 installation methods listed in this article. For example, if you install SSL for a CentOS 7 VPS, you only need: SSH account (admin/sudo rights), Apache web server and PuTTY.
- To ensure you prepare the necessary elements completely and accurately, detailed instructions for each method will be provided in the following sections.
Method 1: Install SSL for VPS CentOS 7
Installing SSL for your VPS CentOS 7 not only protects your data but also improves the reliability and security of your website. Here are some things you need to know so that you can complete the installation easily and quickly.
Factors to prepare
- Vultr VPS running CentOS 7.
- SSH account with root/admin or sudo user privileges.
- Apache is pre-installed.
- PuTTY for SSH connection.
Step 1: Install EPEL package and mod_ssl module
First, to save time, we need to install the EPEL package (Extra Packages for Enterprise Linux) which provides the necessary tools for Certbot and the mod_ssl module that helps Apache recognize SSL certificates. Execute the following command:
sudo yum install -y epel-release mod_ssl
Step 2: Install Certbot
Certbot is a powerful tool for automatic SSL installation. After installing the EPEL package, use the following command to download Certbot to VPS:
sudo yum install python-certbot-apache
Step 3: Create SSL certificate
Use Certbot to generate a Let’s Encrypt SSL certificate for your domain. Replace yourdomain.com with your actual domain name:
sudo certbot –apache -d yourdomain.com
If you want to install SSL for multiple subdomains at once, use the following command and change to the respective subdomain:
sudo certbot –apache -d seconddomain.com -d www.seconddomain.com
During the installation process, Certbot will ask you to provide your email address and complete a simple security check.
Step 4: Set up auto-renewal
Let’s Encrypt SSL certificates will expire in 90 days. To automatically renew your certificates, create a cron job with the following command:
sudo crontab -e
Add the following line at the end of the file:
0 0 * * 1 /usr/bin/certbot renew >> /var/log/sslrenew.log
This command runs every Monday at 12:00 pm and checks and renews all currently installed SSL certificates. So if there are any errors you can fix them on Monday morning.
Method 2: Install SSL for VPS with cPanel
Factors to prepare
- Vultr VPS with cPanel installed.
- Valid SSL certificate.
Access cPanel
Step 1: Open a web browser and access cPanel on your Vultr at the address:
http://yourdomain.com:2083 orIP Address http://11.12.13.14:2083
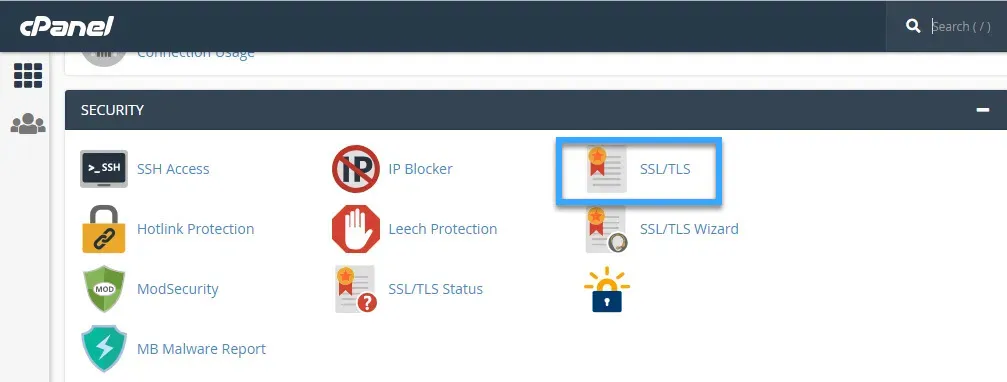
Step 2: In the cPanel admin interface, go to the Security tab and select SSL/TLS .
Upload Private Key
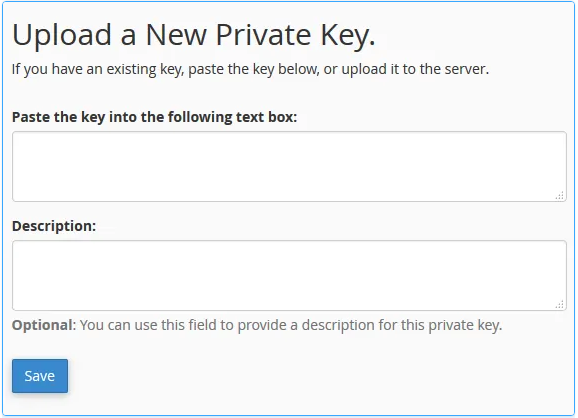
To complete the SSL certificate installation, you need to upload the private key to the system. Here are 2 ways to do it:
Method 1: Download private key manually
- Open private key file.
- Copy the entire contents of the file.
- Paste the copied content into the Upload a New Private Key box .
- Click the Save button to save the private key.
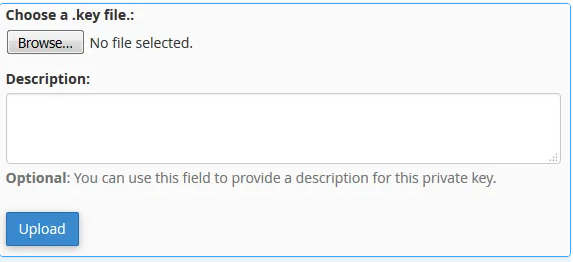
Method 2: Download private key from file (only for .key files)
- Click the “Browse…” button.
- Select the private key file to upload.
- Click the Upload > Upload button again to complete the upload process.
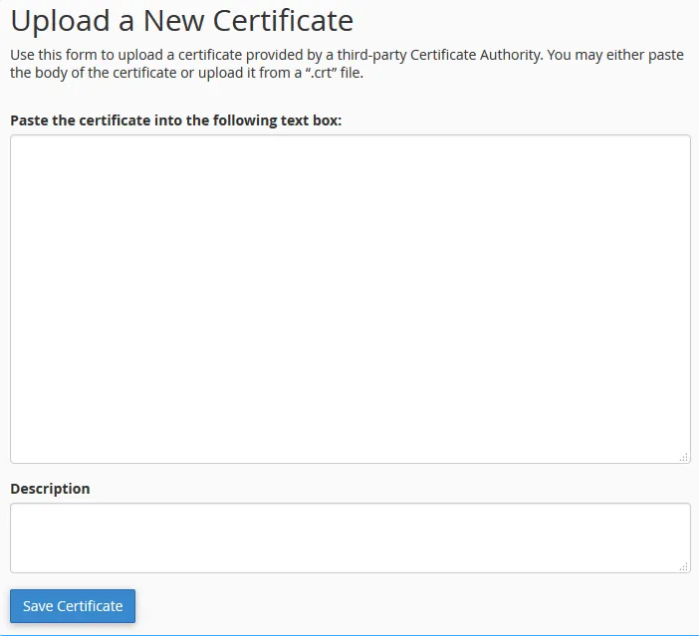
Upload SSL certificate
- Return to the SSL/ TLS page interface , select Generate, view, upload, or delete SSL certificates .
- Upload the SSL certificate file from your computer.
- Click Save Certificate to save the settings.
Install SSL certificate on website
After uploading and storing the SSL certificate to your Vultr VPS, you need to perform the final step to activate the certificate for your website:
Step 1 : Go to Manage SSL sites and select Browse Certificates . cPanel will automatically handle the next steps.
Step 2 : Click the Install Certificate button to complete the SSL installation for your website.
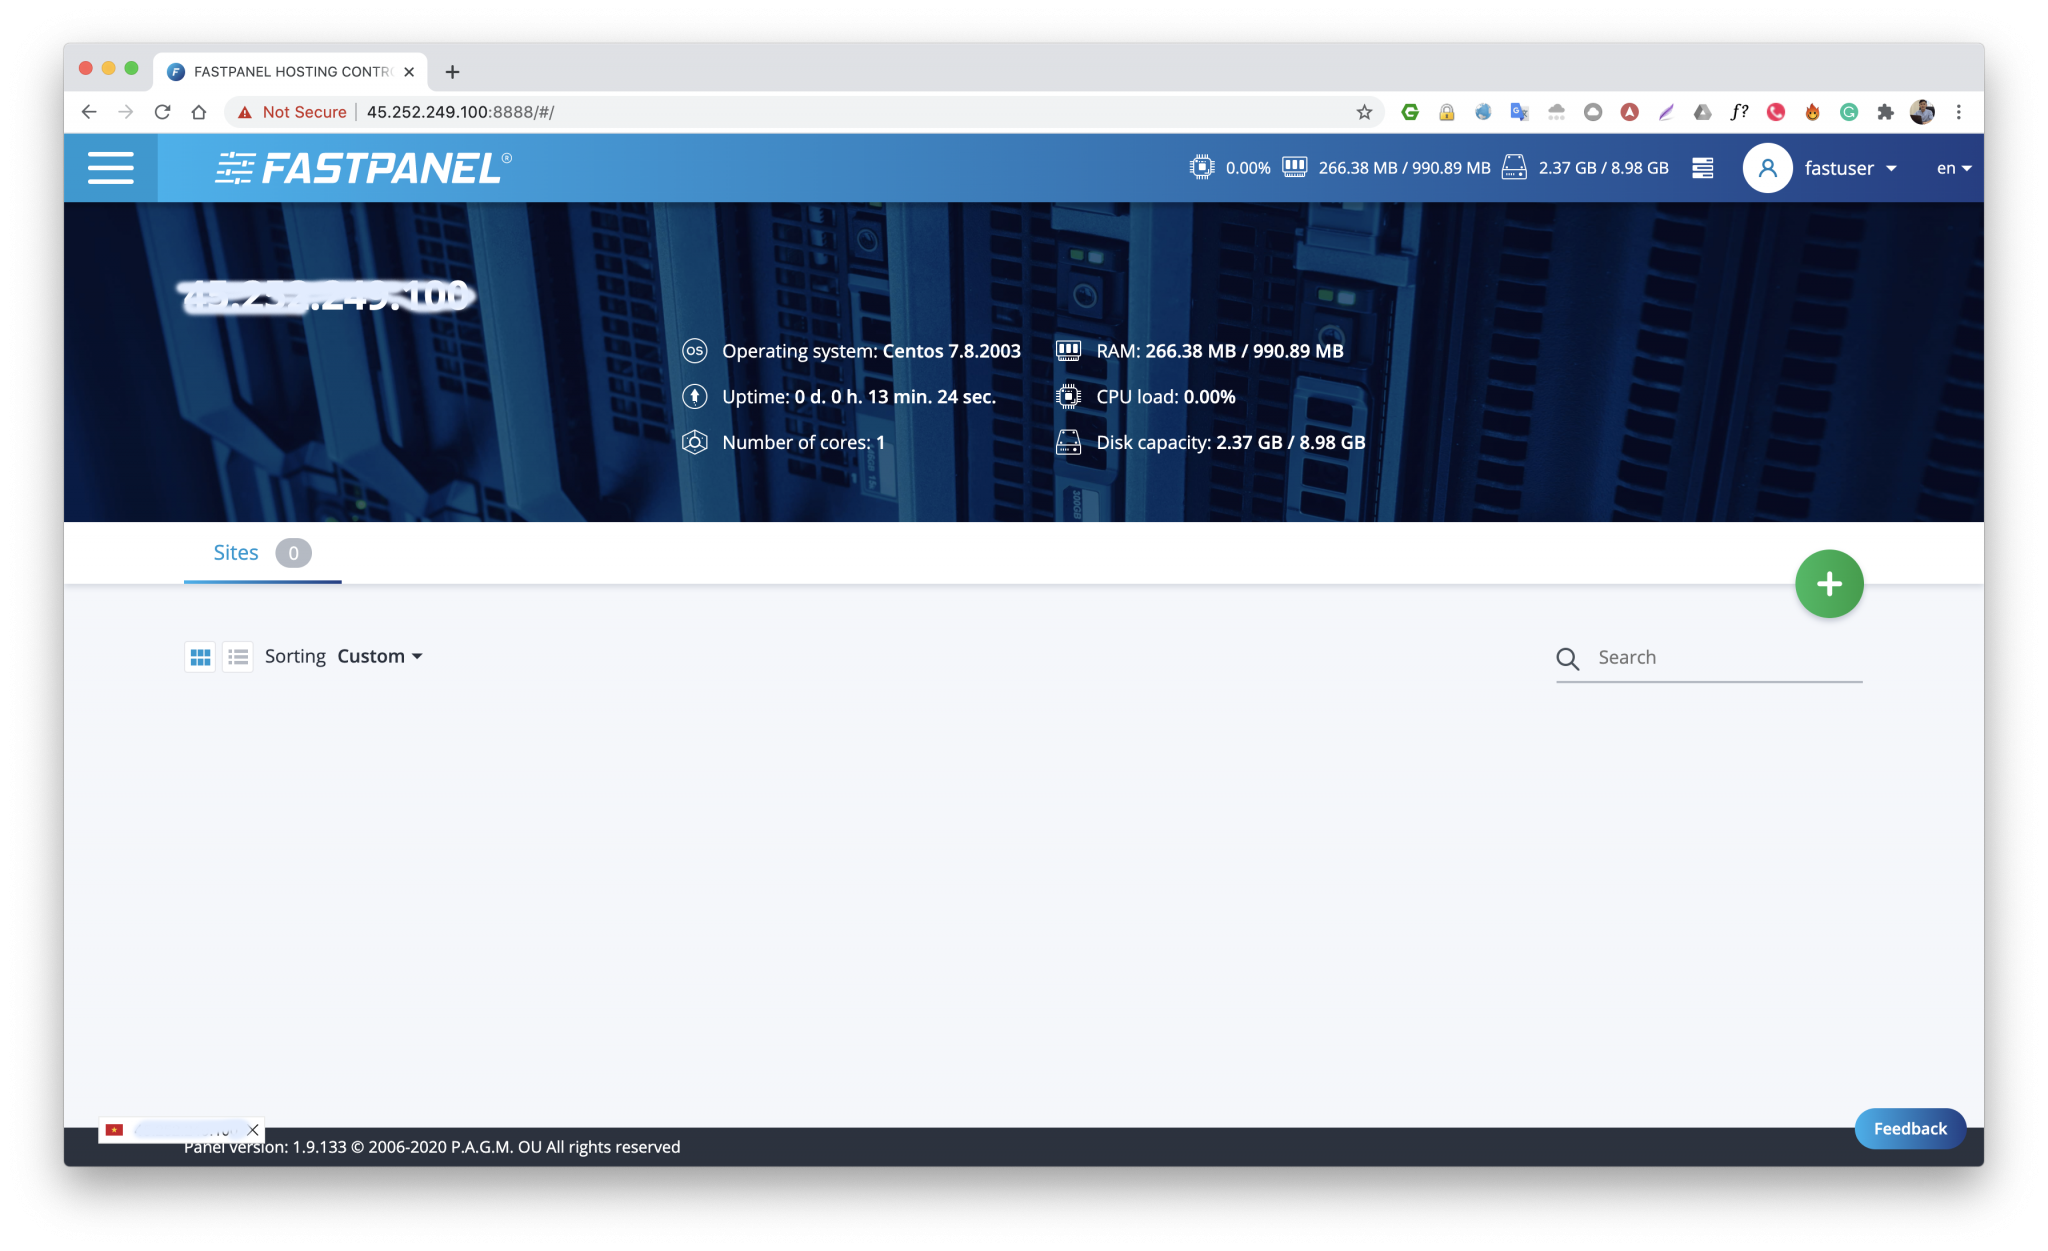
Method 3: Install FastPanel then install Let’s Encrypt.
You can follow this post then install free Let’s Encrypt. I also often use FastPanel for my server because it’s simply completely free and full-featured.
Above are 3 simple and easy methods to install SSL on VPS at Vultr or any other provider. If you have any difficulties, please leave a comment or contact us for help.